
Personal insights since 2004!
@richardrathe (Mastodon)
@wisdom (Mastodon Bot)
@richardrathe (Youtube)
mdpaths.com (Newer Stuff)
rathe.medinfo.ufl.edu (Old UF)
Where I've been and what I've learned along the way…
Personal insights since 2004!
@richardrathe (Mastodon)
@wisdom (Mastodon Bot)
@richardrathe (Youtube)
mdpaths.com (Newer Stuff)
rathe.medinfo.ufl.edu (Old UF)
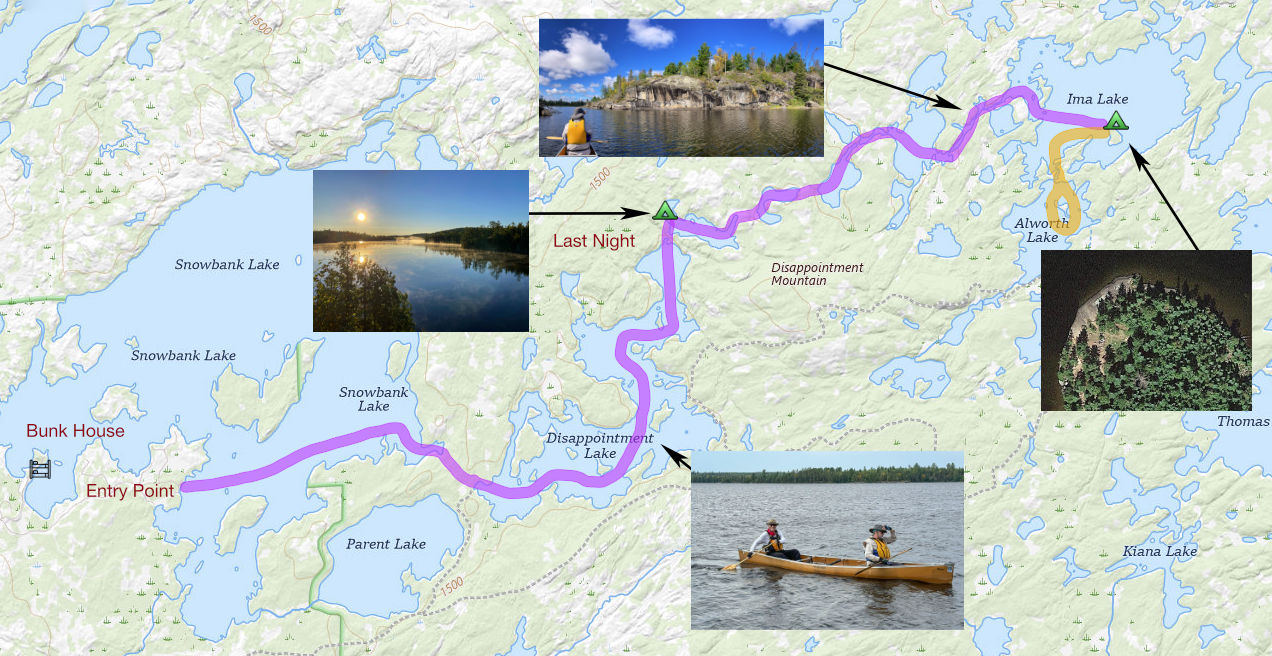
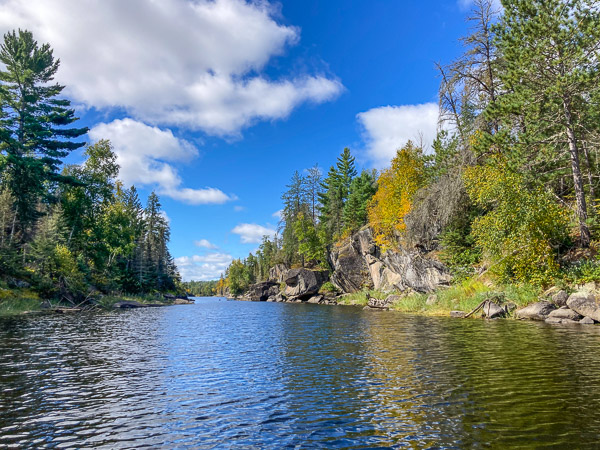
This year we decided to base our trip out of Ely. We spent the night in the bunkhouse on Snowbank Lake. The next day we took the short drive to the official entry point #27 to head out into the wilderness. Complete Photo Gallery
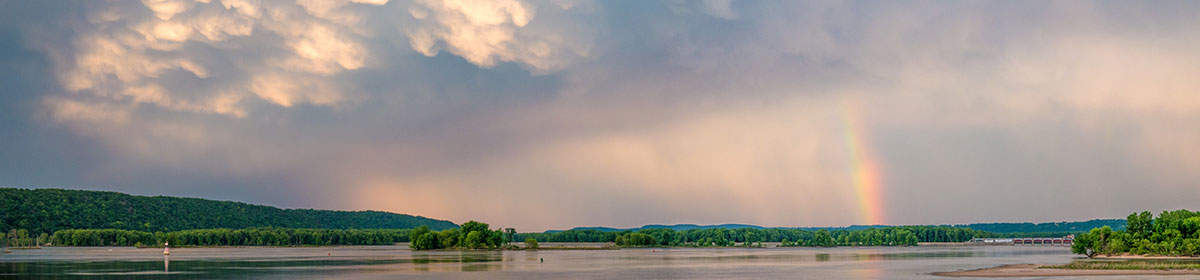
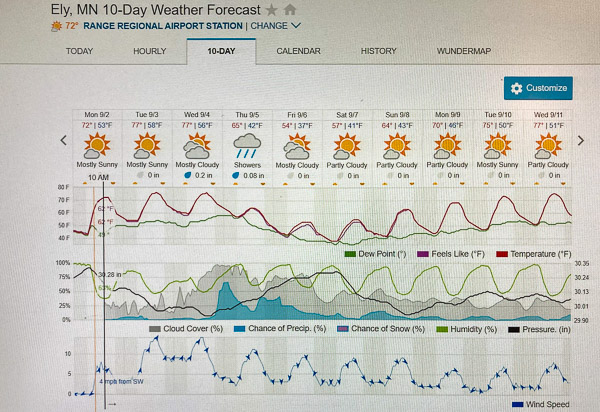
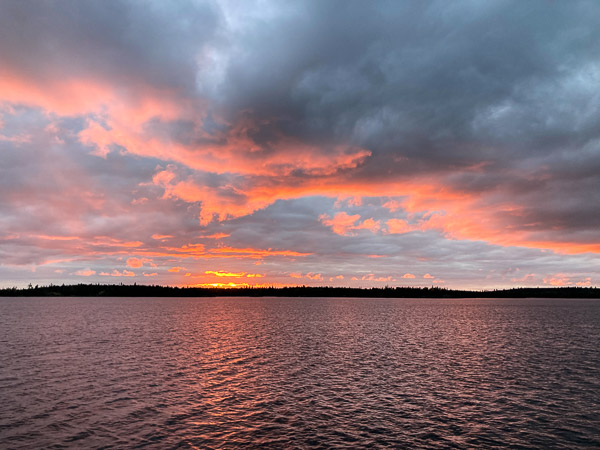
The weather forecast was windy with a dash of rain in the middle. This mostly came to pass with temps dropping near freezing on the final night.
The first portage was the longest at 140 rods (2310 ft, 0.44 mile). There were seven portages in all on the way to Ima Lake. Several of these are very short between small connector lakes.
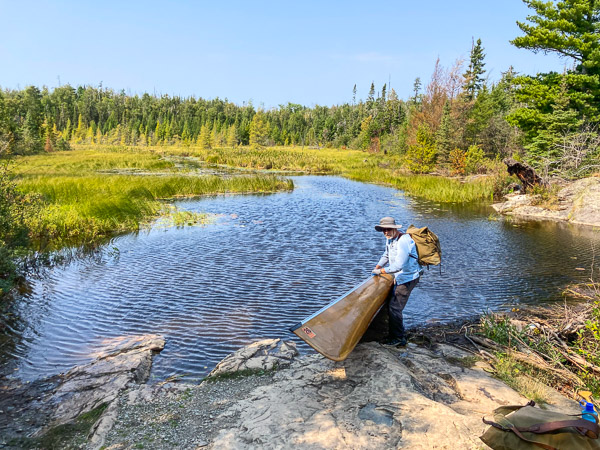
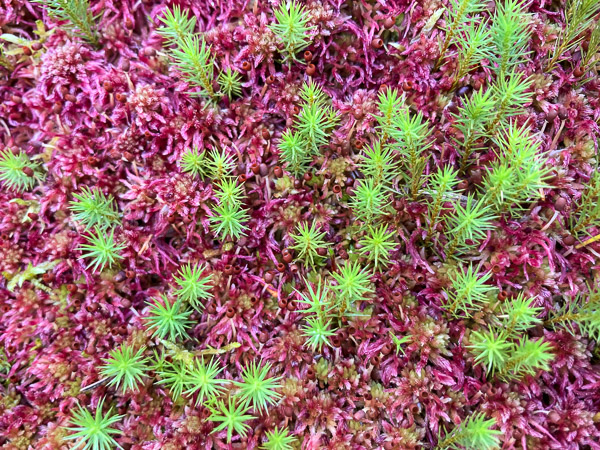
The smaller lakes where part of extensive wetlands with lots of fall flowers, sphagnum moss, tamarack just starting to turn yellow, and even a few spent pitcher plants.

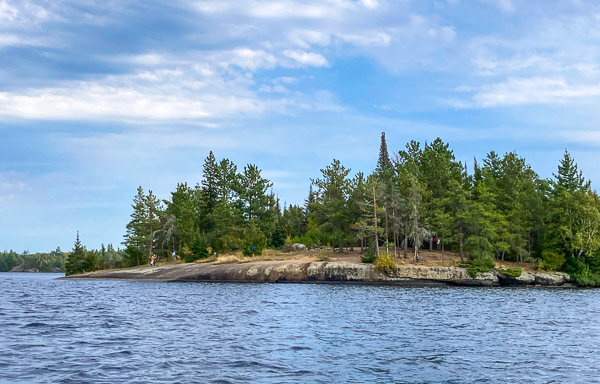
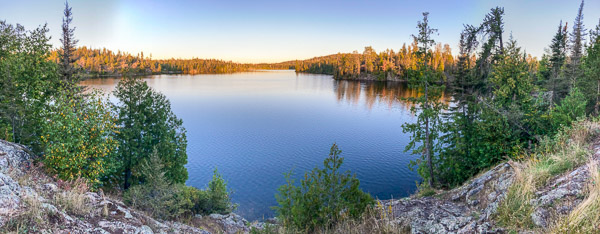
We got to Ima in the late afternoon and proceeded to the large campsite on the north end of the major island. This is fronted by an impressive dome of rock more than 100 yards wide.
I pitched my tent on the windward side and it was (no surprise) very windy. So much so I decided to move before the predicted rain storm rolled in. It was warm enough to sleep with the sleeping bag loosely draped around me. That would change also.
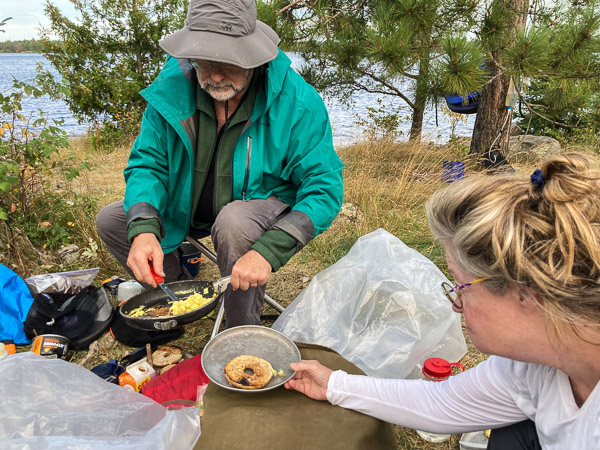
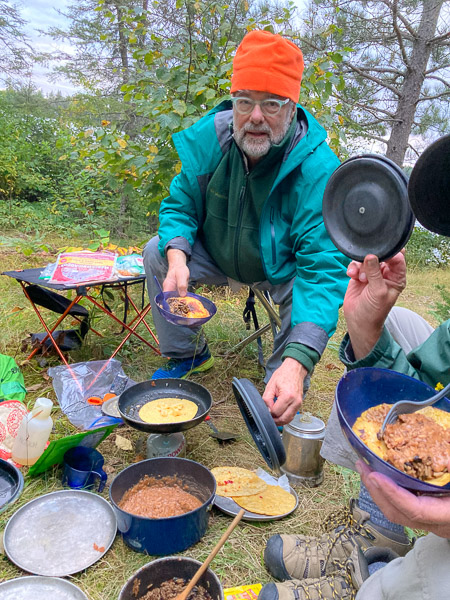
The next day we started out with a hot breakfast of bagels an eggs. Most of our cooking took place behind a large rock to keep the stoves out of the wind.
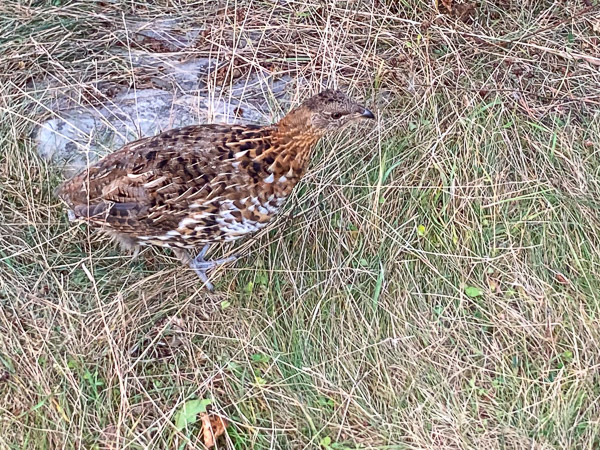
In the afternoon we had nine Spruce Grouse wander through our camp. We think it was a hen with her nearly-grown brood.
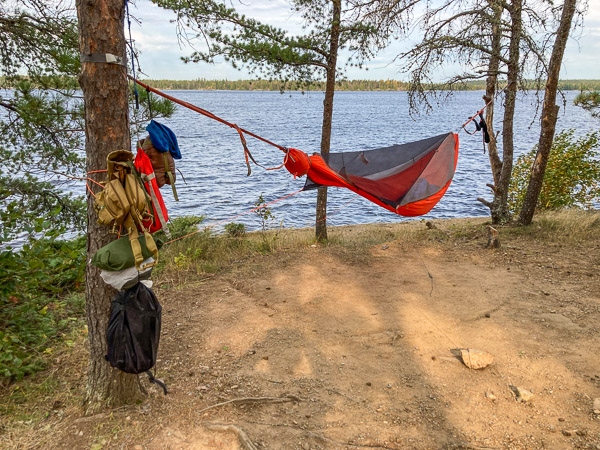
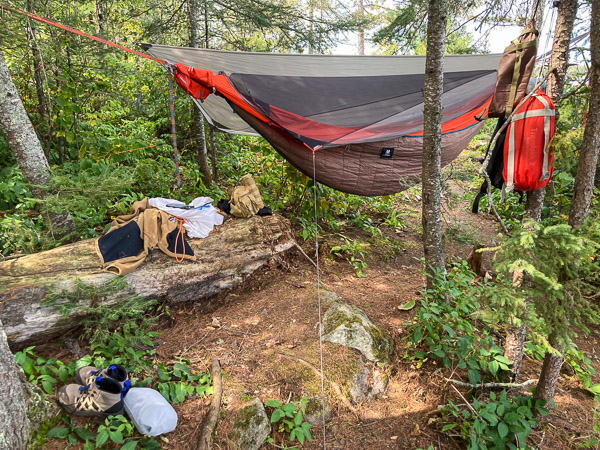
The second hammock site was a bit of a challenge, but a real confirmation of how flexible hammock camping can be. I was pitched over a fallen log and a large rock! It turned out to be a perfect place to weather the storm that blew in overnight! (The rain fly is folded back in this photo. The brown fabric is an inexpensive underquilt I brought to help keep out the cold.)
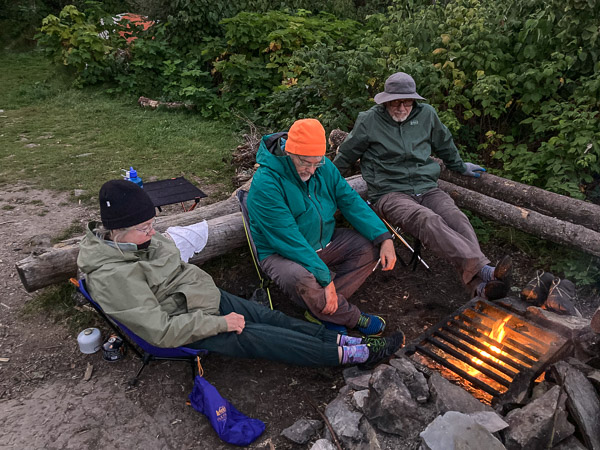
The rain ended and the temperature started to drop as the wind shifted to the northeast. It was not a good day to go out in the canoes so we mostly hung out, read our books, and napped. In the evening we hunkered down in a sheltered spot and had an excellent taco dinner.
On the fourth day the wind dropped off and we went on a day trip south to Alworth Lake. There is a nice campsite just off the portage in a grove of large white pines. It faces south and has a nice view through the trees.
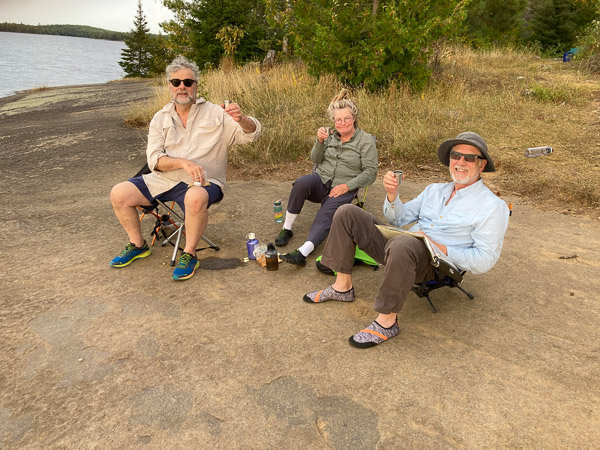
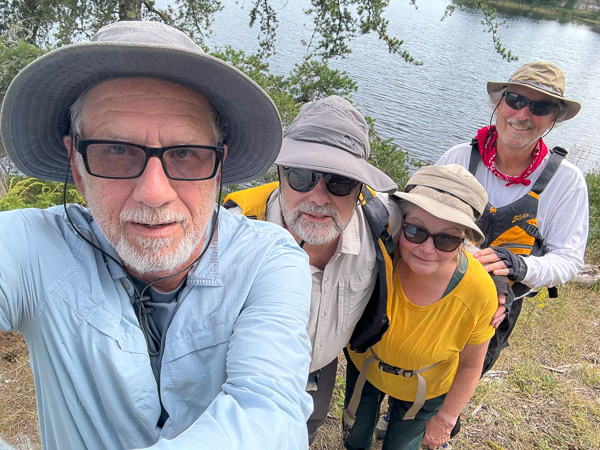
There is also a nice, but rarely used campsite on a small island. We stopped there for a snack and took this group photo.
We decided to move camp for the last night to get some of the portaging out of the way. We retraced our path through this narrows (part of Lake Jordan) with several interesting cliffs.
Our initial goal was a campsite with a beach on Jordan, but it was occupied so we kept going. We ended up at a high, “compact” site on Lake Ahsub. It’s on the side of a rock outcrop with several unusual tree species, including this maple, cherry, and mountain ash.

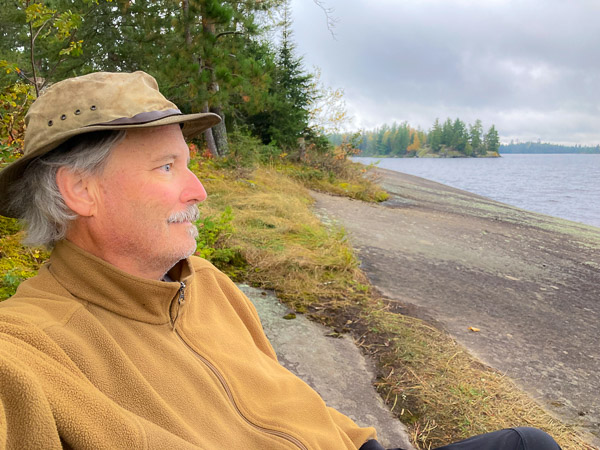
For the first time on this trip the wind died down so we could have a fire. It was also clear and cold! We think it touched freezing by morning.
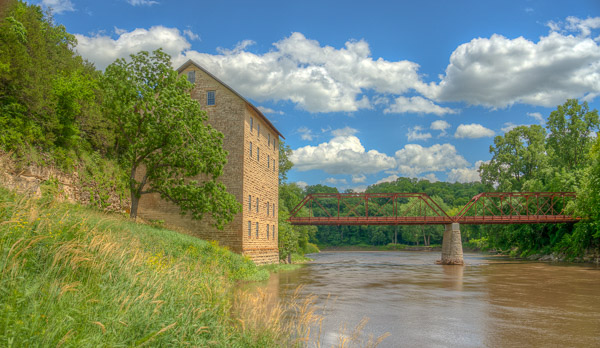
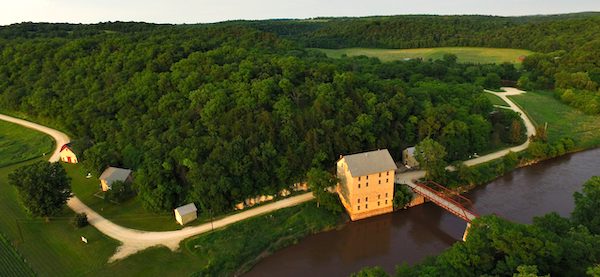
The Town of Motor with a large gristmill took shape in the 1870s along the Turkey River in Clayton County Iowa. Nothing remains of the town itself, but the mill and associated buildings survive. The Mill is situated at a narrow bend in the Turkey River. It was built of limestone quarried from the nearby cliff top and oak from the surrounding forest. [Full Gallery]
At that time the major crop grown locally was Wheat (almost none today)–and wheat must be ground into flour in order to sell it. With this in mind, the partners built a state-of-the-art mill and the infrastructure to support it.
The Motor Mill site is picturesque to say the least. This drone photograph from motormill.org shows the five remaining stone buildings. From left to right they are: The Stable, The Inn, The Smokehouse, The Mill, and the Cooperage. The town itself was to the right and part of that area is now a public campground. The Inn has recently been reopened with a gift shop and overnight accommodations.
Farmers would come in horse-drawn wagons with their crop. After unloading the farmer would stable his horses and take a room at the inn. Bulk flour was typically shipped in wooden barrels and these were produced locally by the cooperage.
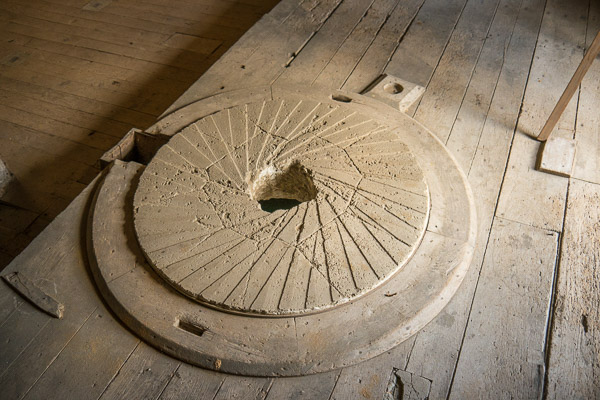
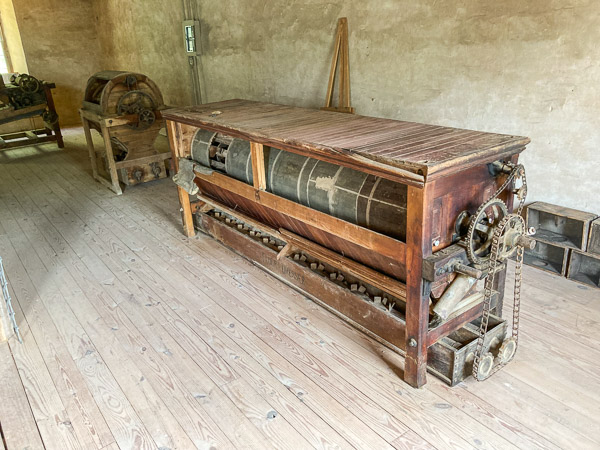
After the business failed, the property was sold and the mill became a barn. As such, much of the internal machinery was sold off. One notable exception are the four grindstones. These are embedded in a raised platform that is structurally isolated from the rest of the building. When the mill was operating, four companion stones weighing hundreds of pounds each would spin at 90rpm on top of these fixed stones to do the grinding. Apparently this generated lots of noise and vibration!
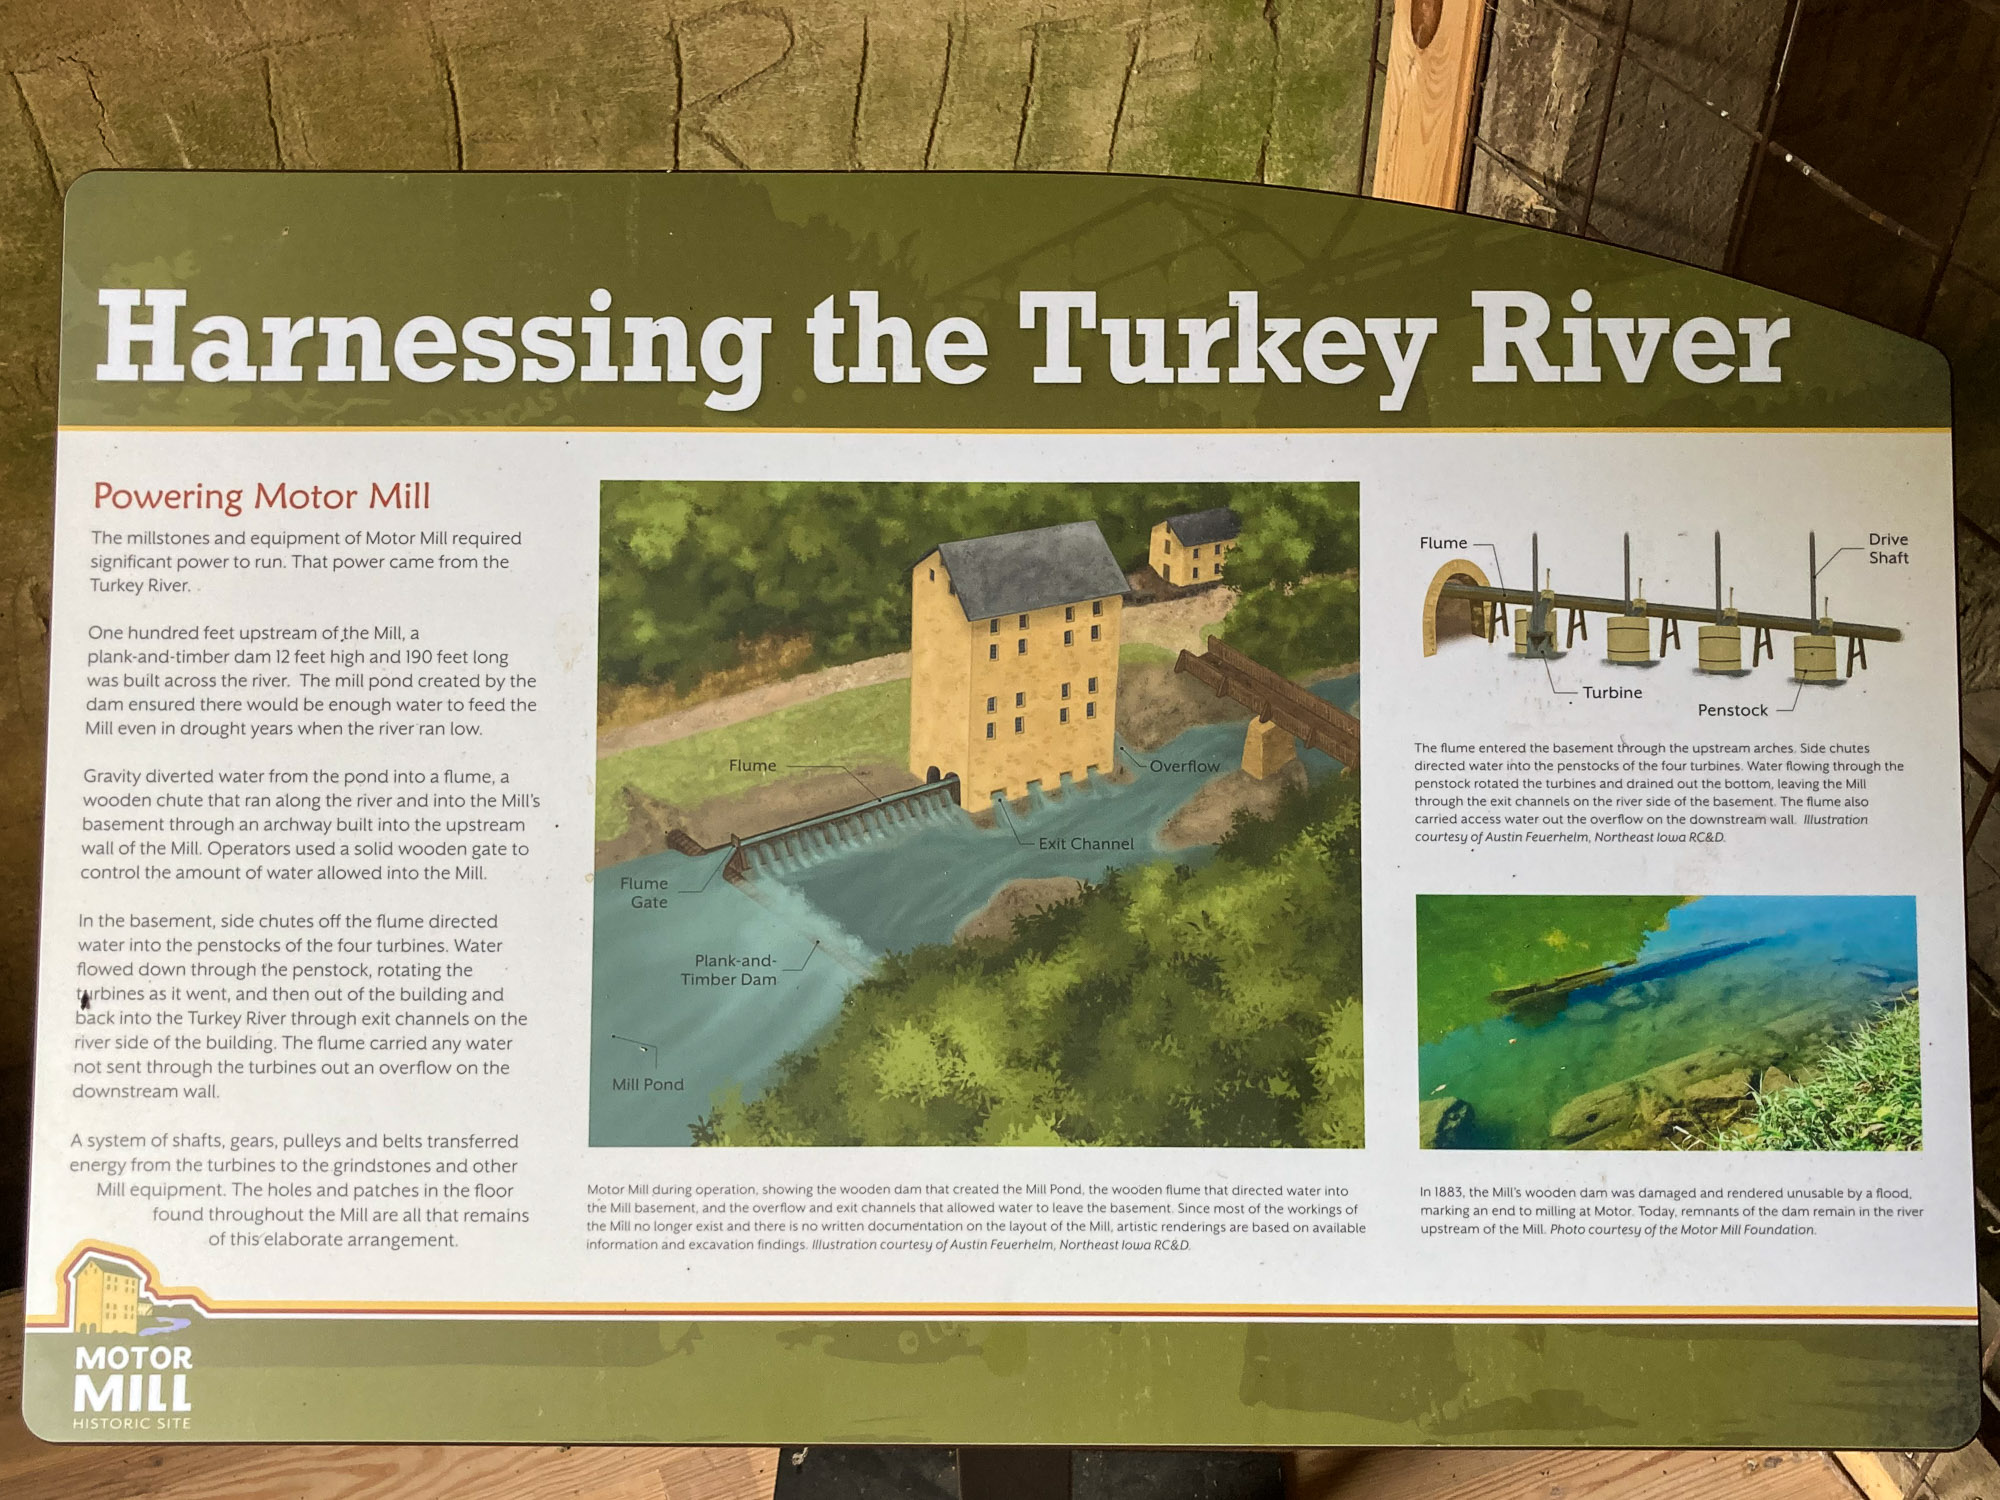
Operationally the mill relied on gravity to do much of the work moving product around. This schematic captures most of the complexity (click to enlarge).
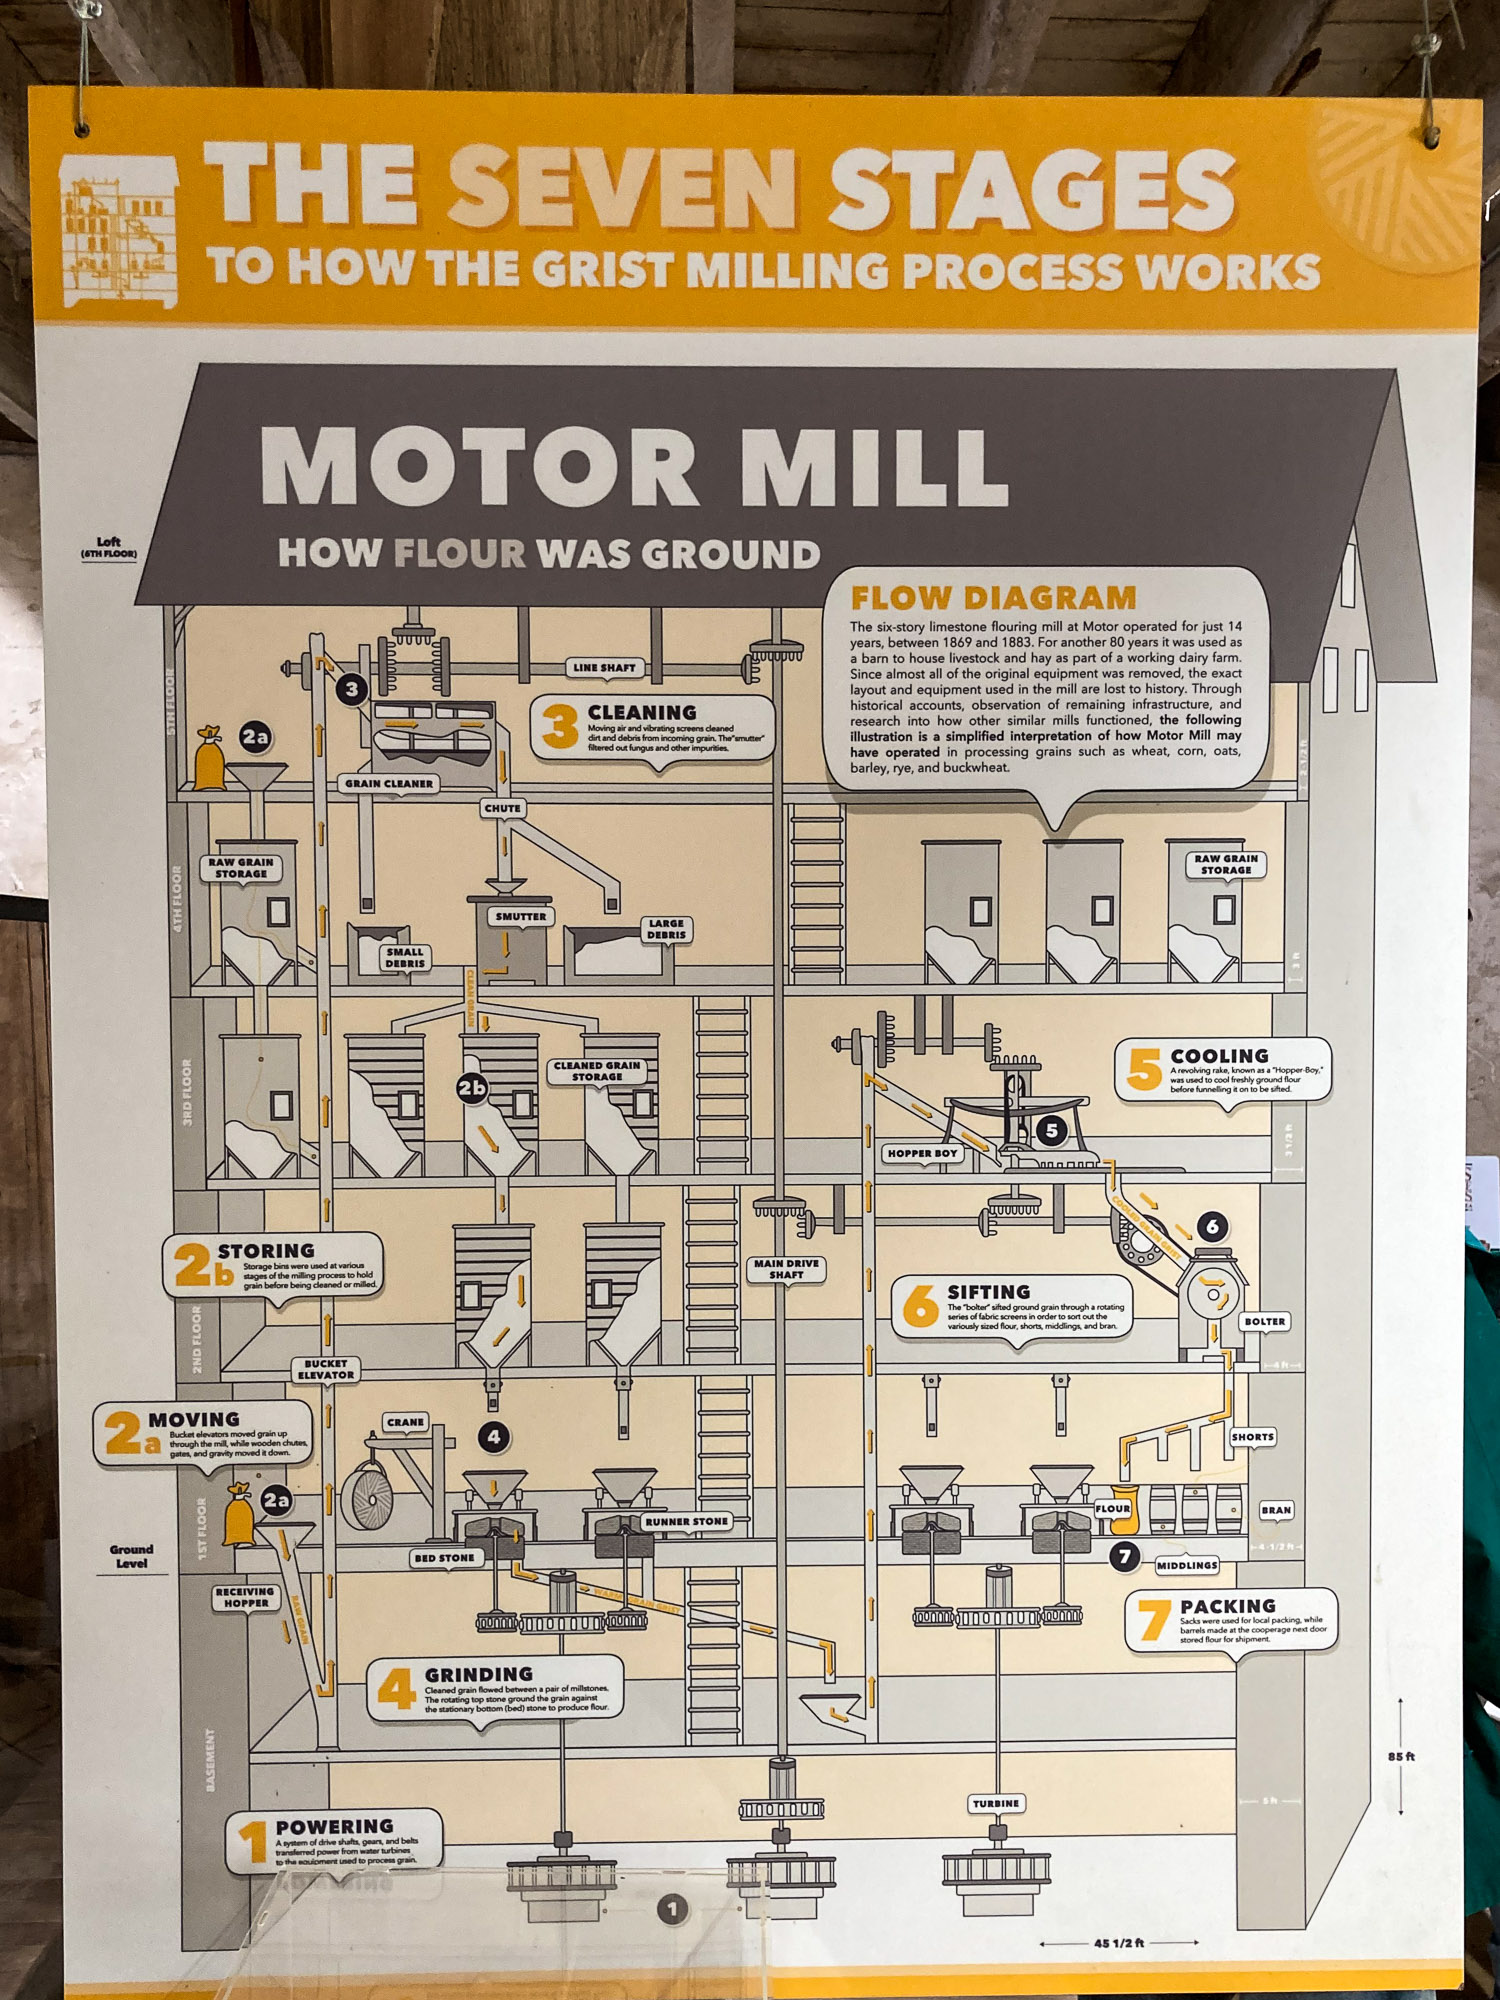
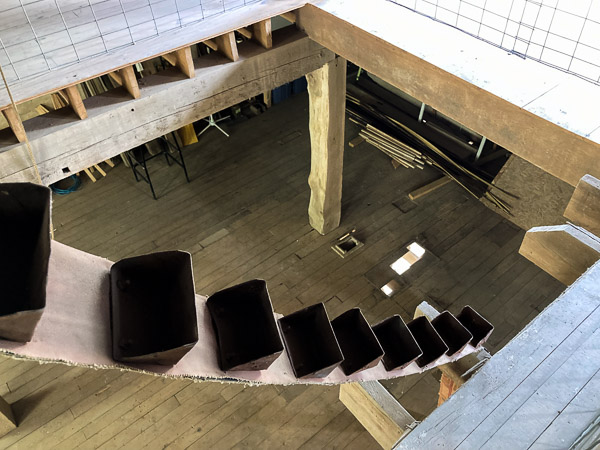
There were a series of “elevators” (similar to the belt shown below) that would bring materials to the upper floors. (Also note the 12×12 inch solid oak beams used in construction!)
The grain or unfinished flour would then fall through a series of separator and cleaning machines. The site has recently obtained antique equipment similar to that used in the original mill. The apparatus in the foreground is labeled “Flour Dresser”.
The Mill was derelict until very recently. A non-profit foundation is now in charge of preserving and making it available to the public. Great progress has been made in the past two years. In particular, the huge vaulted basement was mostly unexplored due to twenty feet of river mud deposited there by frequent floods. Volunteer excavators and archeologists “dug in” to find out what lay below all that mud.
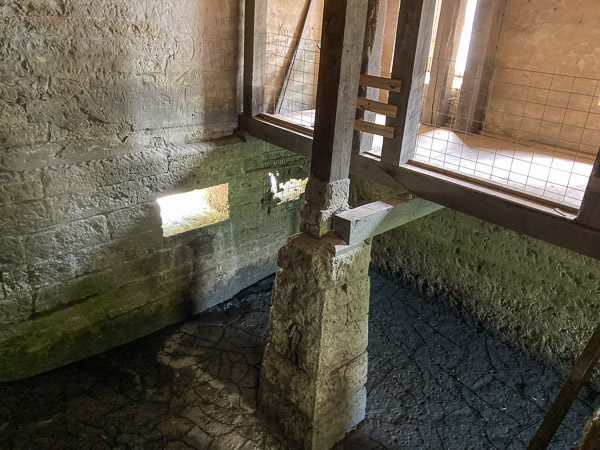
In the photo above the mud has already returned to a level above the outlets to the river. The rectangular openings on the left are overflow ports. The power for the mill came from vertical water turbines. This is a more efficient design than the classic waterwheel. On the lower right is one of the vertical shafts transmitting power from the turbine below.
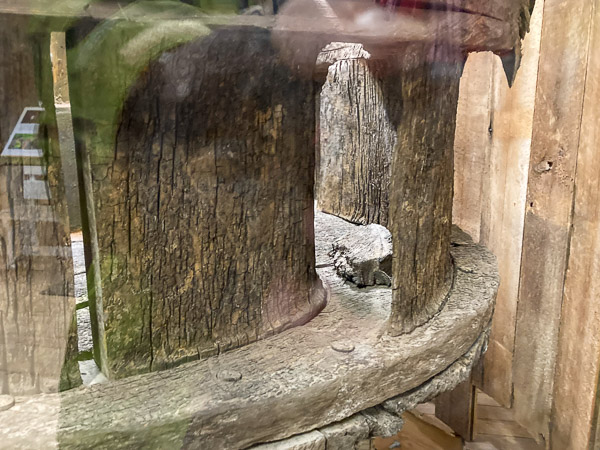
It was thought, and some illustrations still show, that there were three turbines. However, it became clear during the excavation that there were four. Not only that, these were not made out of steel, but crafted from the local oak!
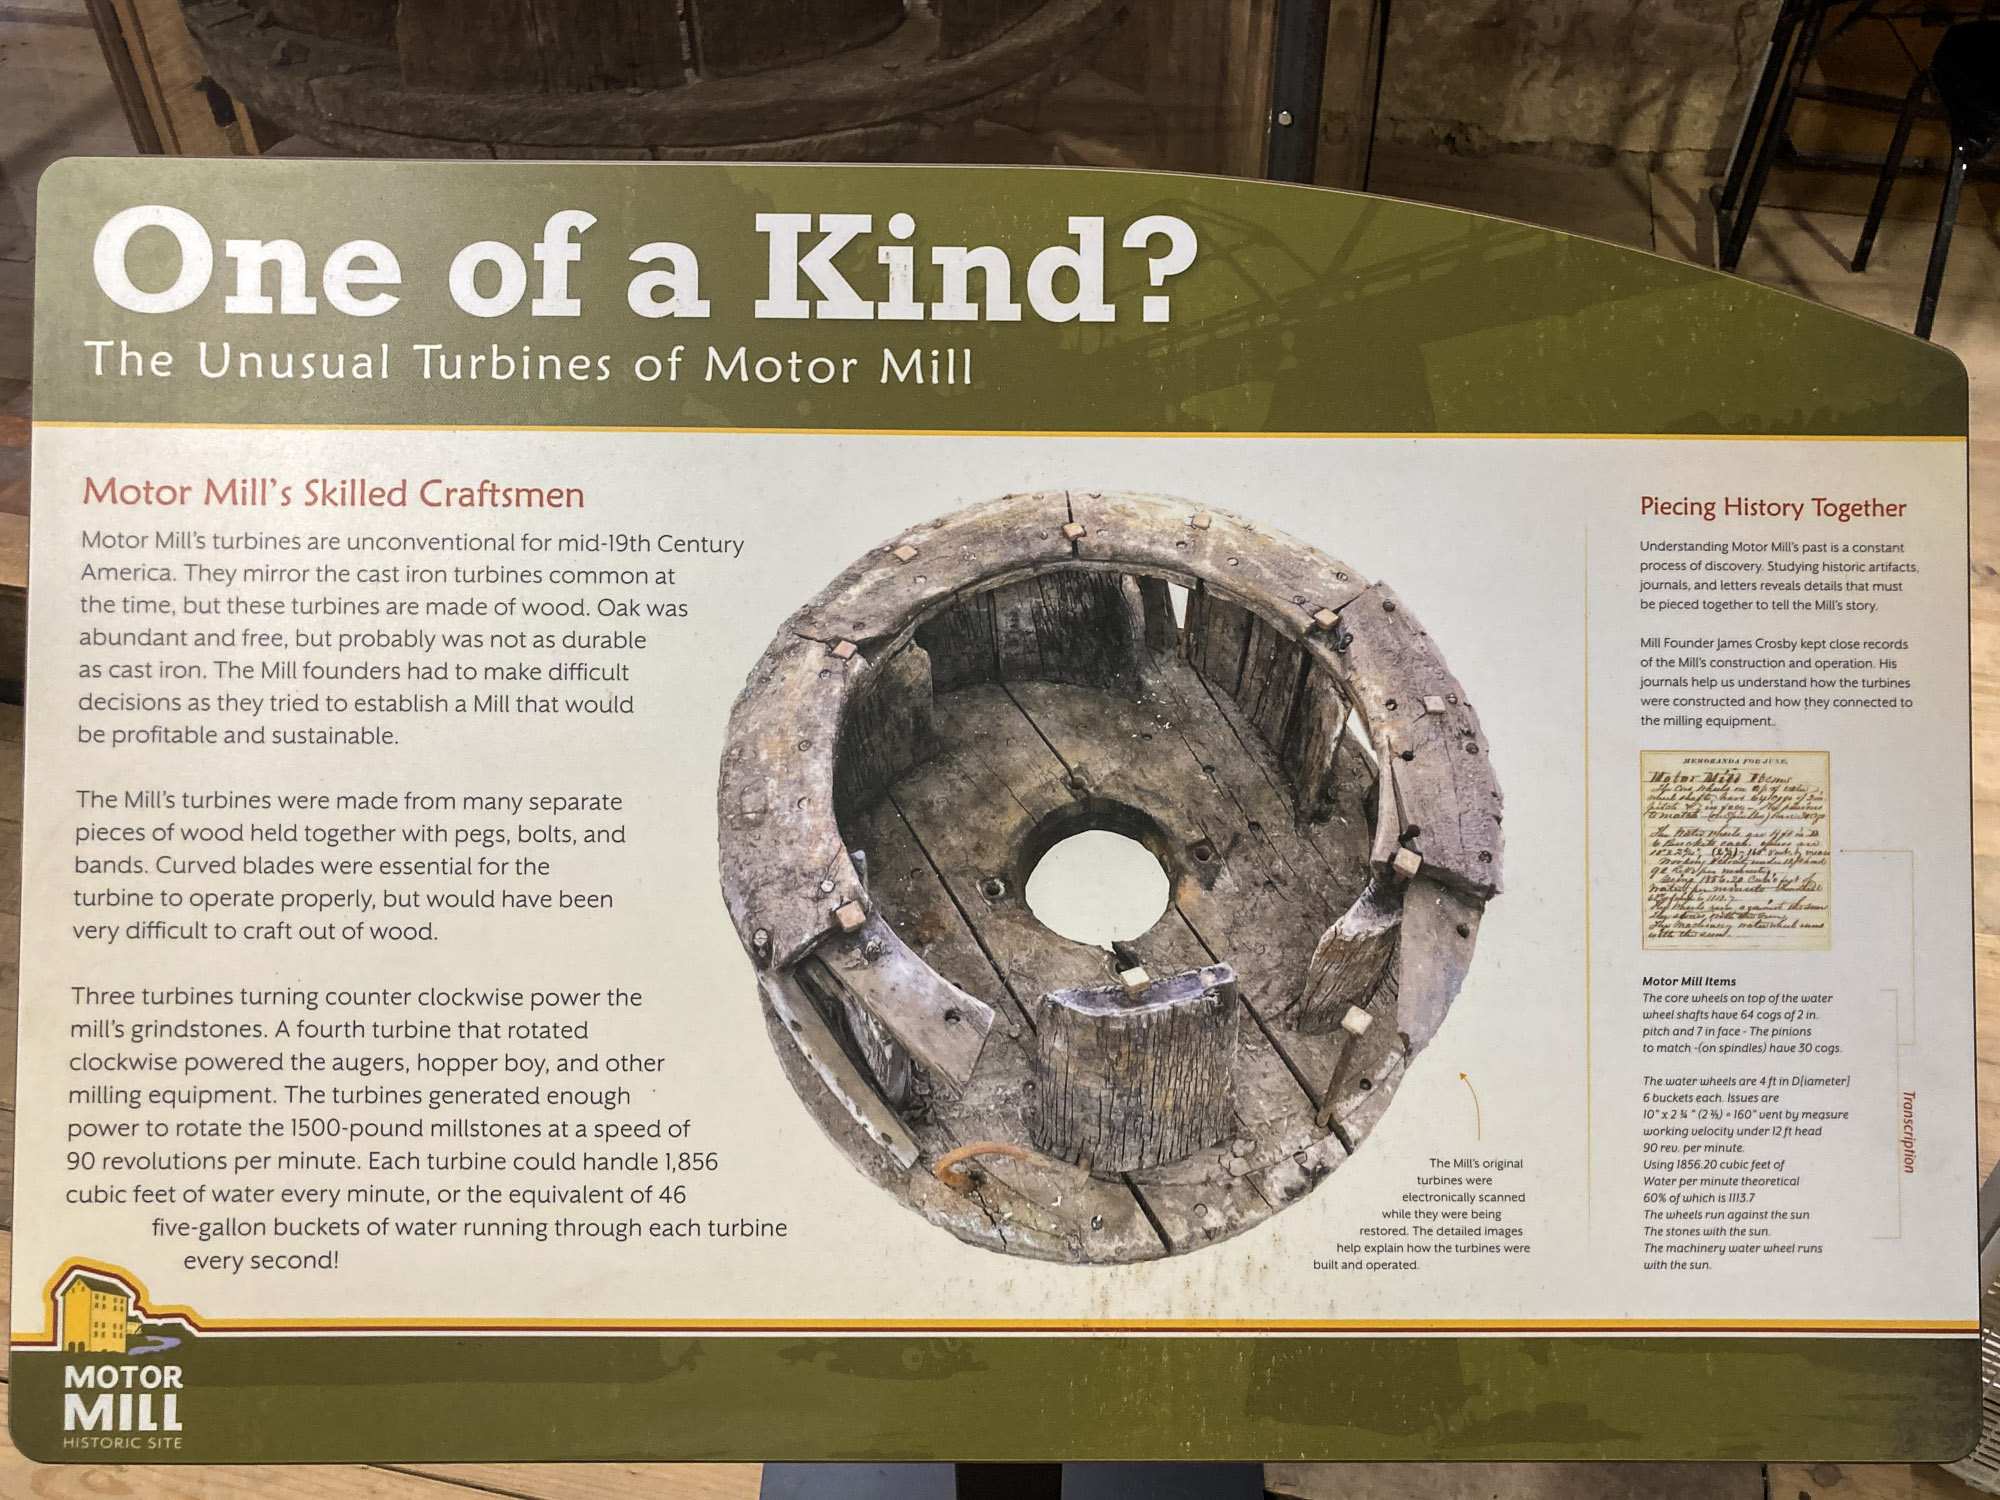
One of the turbines has been preserved and is on display!
Together these four hand-crafted wood turbines developed about 250 horsepower to run all the machinery in the mill!
I recently had a chance to walk through the entire Mill with my 360 camera.
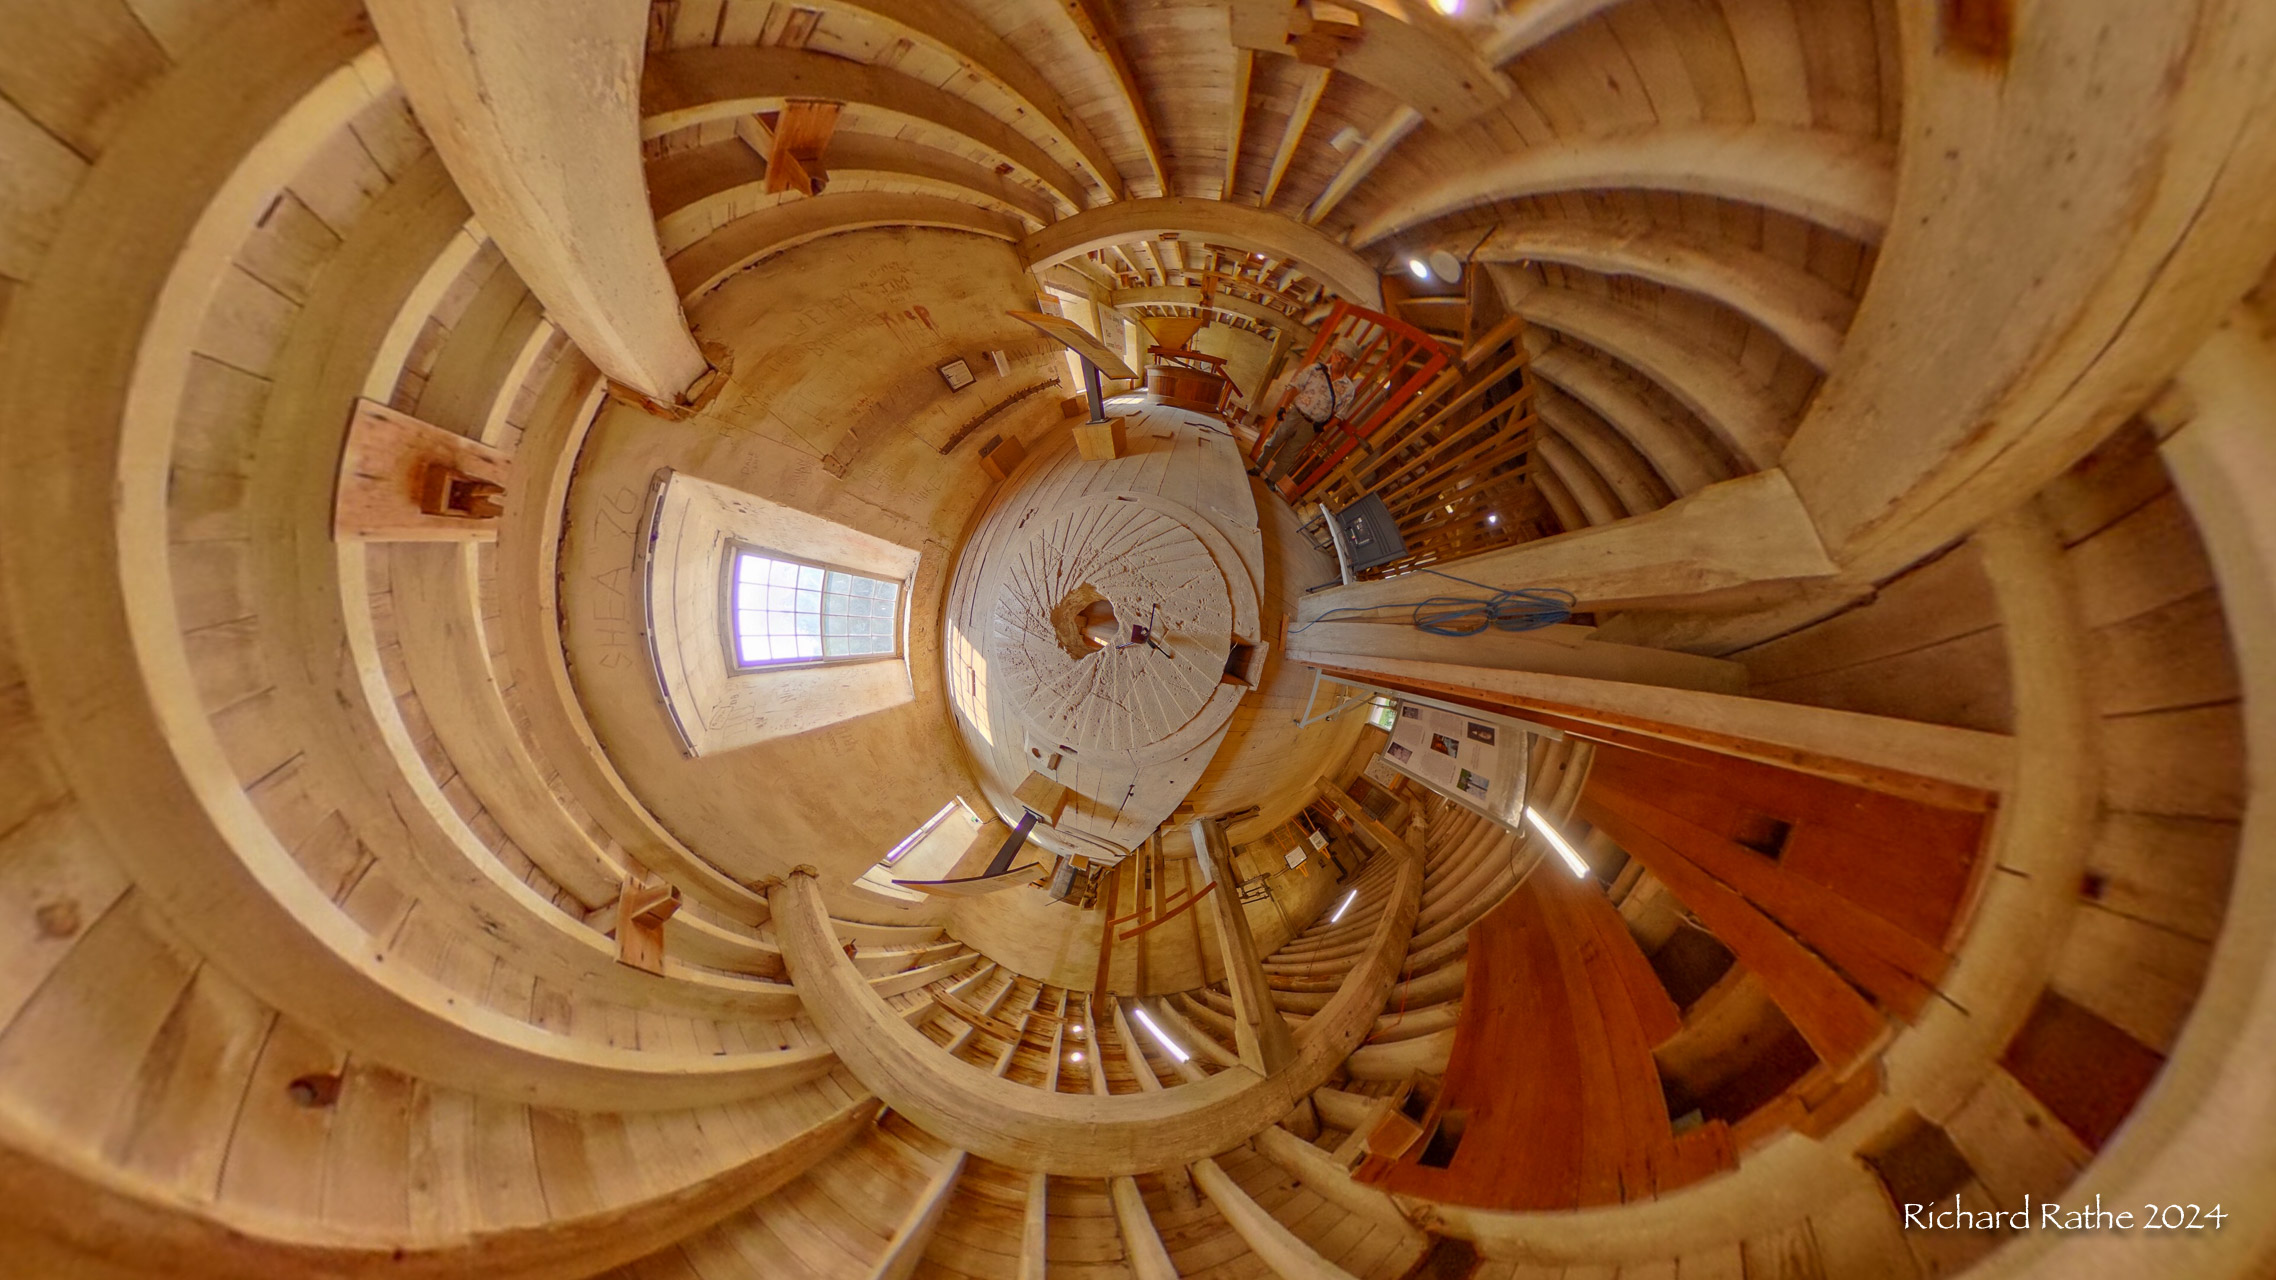
The above “little planet” projection shows one of four mill wheels. Power came from below, turning the top stone (now removed) on the base stone seen here. The grain was fed in from top and the milled product left thru the small opening on the right.
The sort video above shows the raw rectilinear footage followed by a “little planet” rendering of same.
For more info check out the Motor Mill Website!
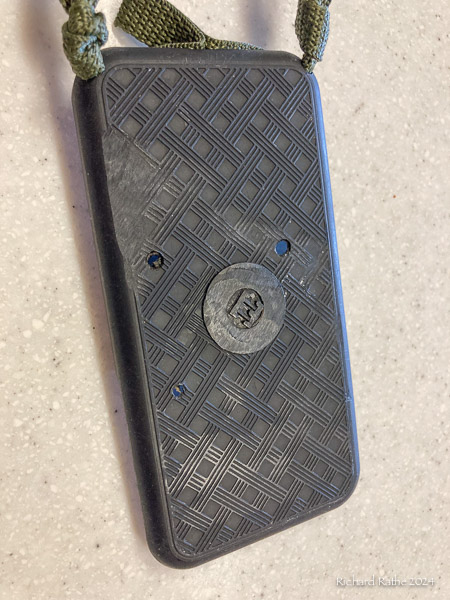
I’ve used two-part “holster” cases for my phone over the past ten years. Now that phones are nominally waterproof I converted one into a neck strap phone holder for sailing, kayaking, canoeing, etc. This is a vast improvement over the “bag” cases which protect the device from water (not needed) but degrade the camera (not acceptable).
The first thing I did was cut off the belt clip with a hacksaw. The result is not pretty but nobody’s going to be looking at it! [Aside: I really don’t like belt clips. They are often uncomfortable and a good way to lose whatever you have clipped!]
My initial effort used light paracord as shown below. The rope was a bit uncomfortable on my neck. I added a bit of clear tubing as a guard but this did not help much. Note the Breakaway Knot (sometimes called an anti-garrote knot!). It is designed to fail with a stiff pull when the strap catches on something so I don’t get strangled!
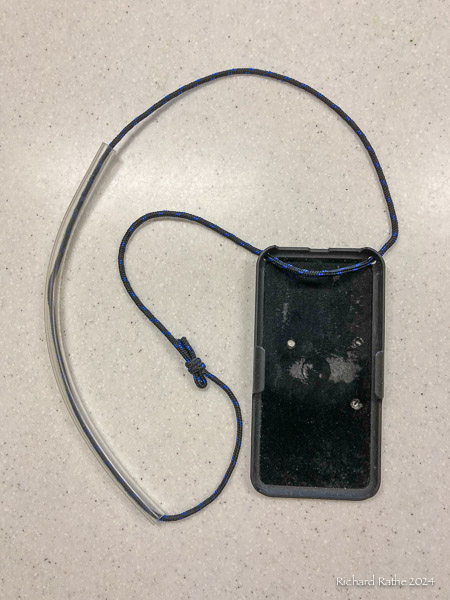
My take on a breakaway knot is pretty simple. It’s just a Double Overhand Knot (a simple knot with an extra turn) with a loop from the other end tucked through it. I’m not sure I’ve seen exactly this configuration before, but every breakaway knot I’ve seen has some sort of “constrictor” knot on one end with an open loop passing through it. I like this design because it is easy to tie and lies flat.
I purchased some bulk polyester webbing and tried again. This was much more comfortable! One difference I found was the knot was easier to break. Just proves that knots behave differently depending on what material they’re tied in. I think it is adequate but time will tell?!
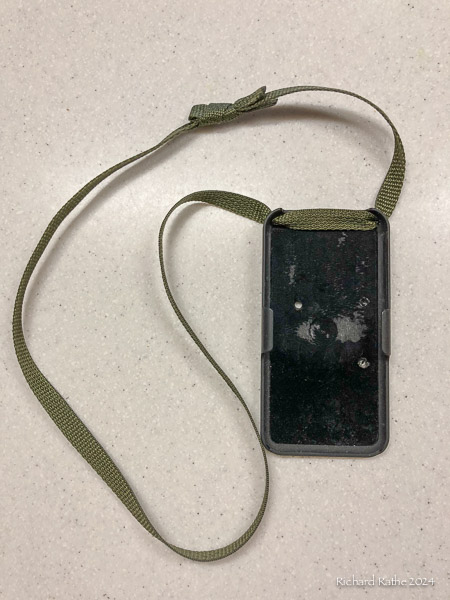
Then there’s the issue of attaching the phone securely when it is not around my neck. I reworked my design with a small sewn loop and two simple knots as show here. Turns out the little loop was unnecessary but I like the way it looks. Anything tied between the two knots would break the case material before it detached!

The phone hangs upside down so I can pick it up and view the screen right side up. The case is friction fit so I just slide the phone in our out. To take a photo or use the flashlight I just pop it up about 20%. You can reverse the phone and completely cover the screen if needed (blowing sand?) but this exposes the camera lens.
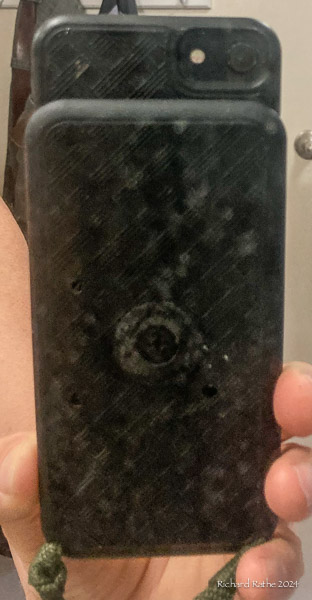
Two Thoughts: 1) There is very little written about breakaway knots, but they are clearly useful; & 2) Why, why, WHY don’t phone cases routinely cover the camera len(s)?! This particular case could have a little nub of plastic sticking down to cover the lens when the phone is fully engaged—but it doesn’t.