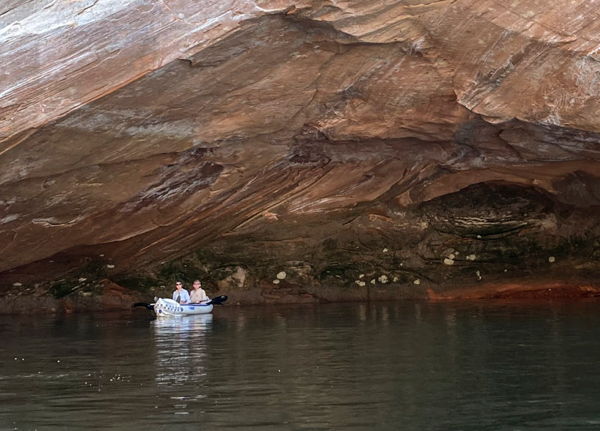
I’ve used a “traditional” inflatable kayak for several years, mostly in special situations such as houseboat camping or floating down rivers. They can be very practical and lots of fun in these settings. They are bouncy and sit high in the water, more like life-rafts than kayaks. The one thing they are not good for is a windy day on open water!
“Sea Eagle” Kayak on Lake Powell 2020
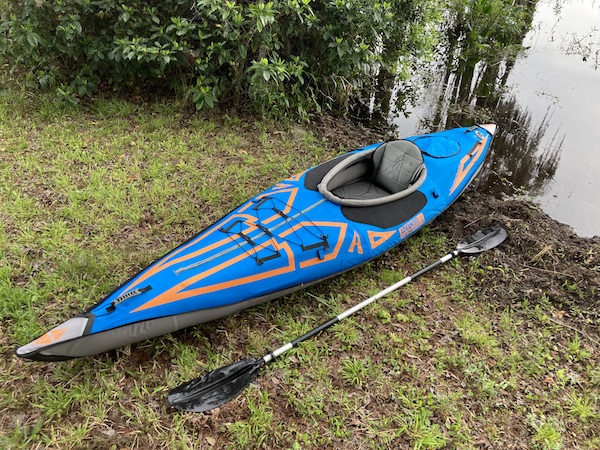
So I was intrigued when I read about newer designs that approximate the capabilities of hard-sided kayaks. Advanced Elements produces several models including the Expedition Elite reviewed here.
Expedition Elite Kayak
The boat is nominally 13 feet long and weighs in at around 42 pounds (not as heavy as it sounds when you consider the design). It is rated to carry up to 400 pounds. The materials, fit, and finish are all very good to excellent. I’ve had a chance to use this kayak in 20 mph winds on a large lake, and on a small river with minor rapids. It performed well in both situations.
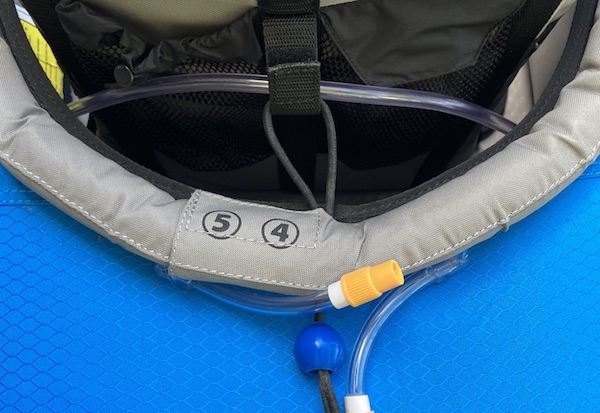
There are several notable design features: 1) Short aluminum frames define the prow and stern. 2) The drop-stitched floor is very rigid (similar to a standup paddle-board). 3) Two concentric floatation chambers (rings) provide redundancy in case of damage/air loss. 4) Seven auxiliary inflatable compartments define the semi-rigid deck. 5) An outer envelope gives the boat shape and protects everything else.
There are a total of eleven separate inflatable elements when you include the seat and optional rear “thwart”. Only three of these provide primary floatation (the outer ring, inner ring, and floor). Inflation pressure is low (1-2psi) except the floor (4-5psi). All components noticeably lose some pressure after a day or two. It takes a bit of effort to keep everything topped off.
The entire kayak (potentially including the pump and paddle) folds up into a suitcase-sized duffle. I’ve had some difficulty folding and unfolding it smoothly. When folded there are six or more layers that must slide over each other without binding. Inflation leads to asymmetries that make me think I’ve done something out of order. There is an example in the photo below where you can see the right inner ring bulging towards the midline. I’m not sure if this is some subtle configuration problem or the boat is just built that way. These are minor aesthetic issues to that don’t appear to affect performance.
Other Details
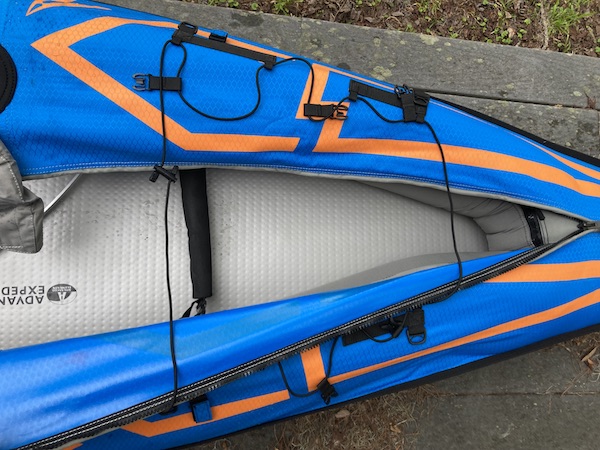
I’m over six foot tall and this kayak is just barely big enough for me to get my legs in. The photo below shows the bow zipper opened to reveal the adjustable footrest and limited storage space beyond. (Also note the dimples of the drop-stitched floor.) The more substantial rear storage area has a clever hatch that rolls up like a dry bag.
Bow Zipper Open
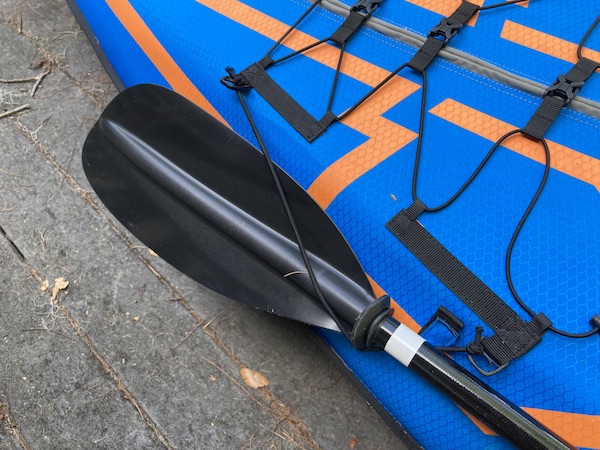
The biggest deficiency/flaw so far has been the position of tie-downs for the paddle and gear. There are two velcro attachment points on each side for holding a paddle, however the forward points are too far away to be useful. I remedied this by tying a short length of shockcord between the existing d-rings. The other end of the paddle fits nicely into the rear velcro strap.
Improvised Paddle Rest
Another irritation was the seat falling out when I picked the kayak up to move it. There was no attachment behind the seat so I added one using an elastic toggle.
Toggle Threaded Thru Hole Behind Seat
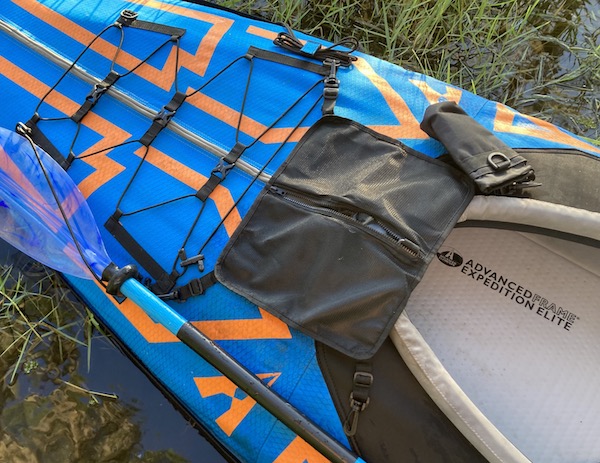
I have a similar problem storing small gear. My other kayaks have easily accessed cubbies for gear and slots for water bottles. Again the attachment points on this boat are all too far forward. I’m thinking of adding d-rings to the black side panels to attach a deck bag.
Proposed Deck Bag Location
Bottom Line
Pros
Lightweight compared with plastic or fiberglass equivalents.
Subjectively 80% of the feel and performance of a hard-sided kayak.
Less vulnerable to waves than you’d think. (An optional skirt is available.)
Enough floatation to carry a significant amount of gear.
Very portable. Packs into a single duffle!
Cons
Leg area somewhat cramped for taller paddlers.
Gear attachment issues outlined above.
Need to top off inflation frequently.
Complicated, many parts that can move in or out of place.
Overall this is a very functional kayak, even compared with hard-sided models. The combination of partial frame and drop-stitched floor give it a solid feel on the water. Plus you can carry it in the trunk of your car and store it in the back of a closet!
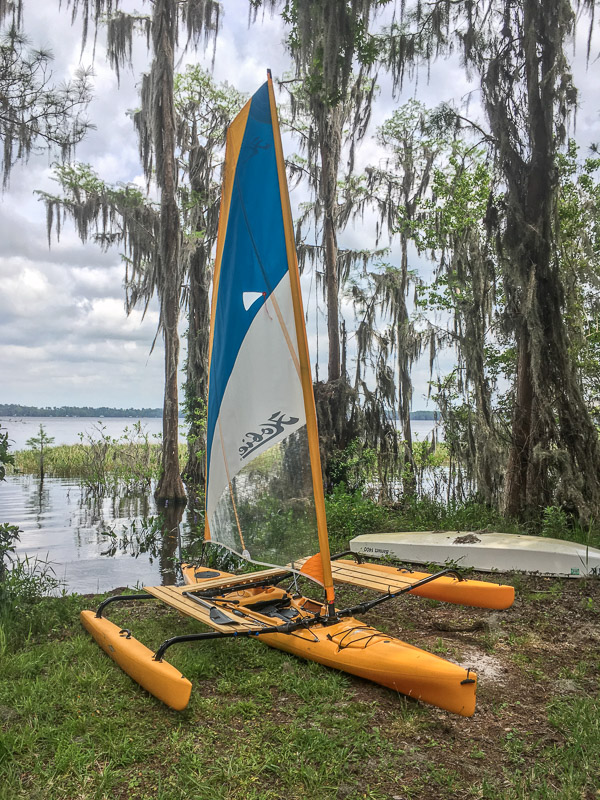
In 2018 I acquired a used Hobie Adventure Island sailing kayak. It came with trampolines that fit between the outriggers. As I learned the particulars of the craft it became obvious that getting out of the cockpit and sitting in/on the tramps wasn’t going to work for me.
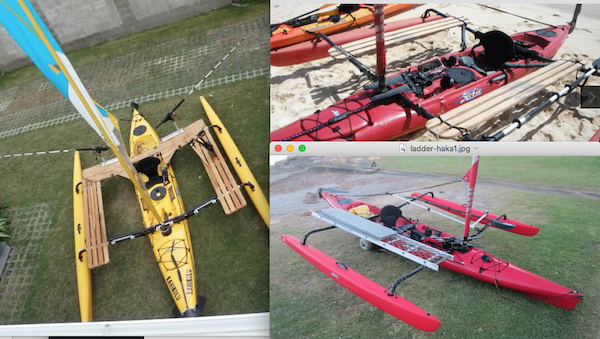
I started looking around and found many kindred spirits on the Hobie Forums site. Adding homemade benches (aka “hakas“) was the obvious solution. To summarize the many materials and designs: simple wooden slats, PVC pipe, metal pipe, ladders, and something called FRP (fiber-reinforced plastic). Here is a sample of what I found…
Source: Hobie Forums
Version 1
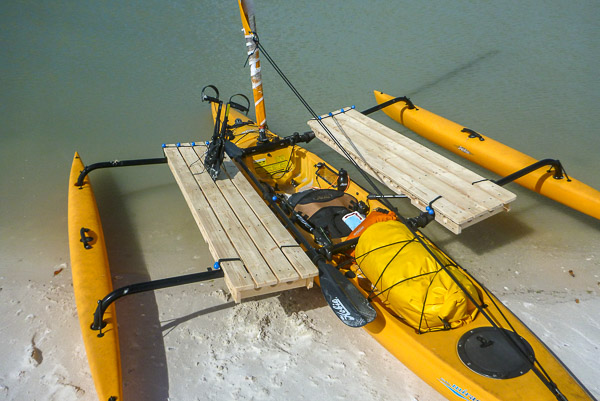
I have basic woodworking skills so I decided to use generic 1x4s from the local lumber yard (about $100). I focused on making them as strong as possible. I finished the benches and took off for the Everglades with them untested. Here is a photo of my version 1 hakas…
Pavilion Key, Everglades
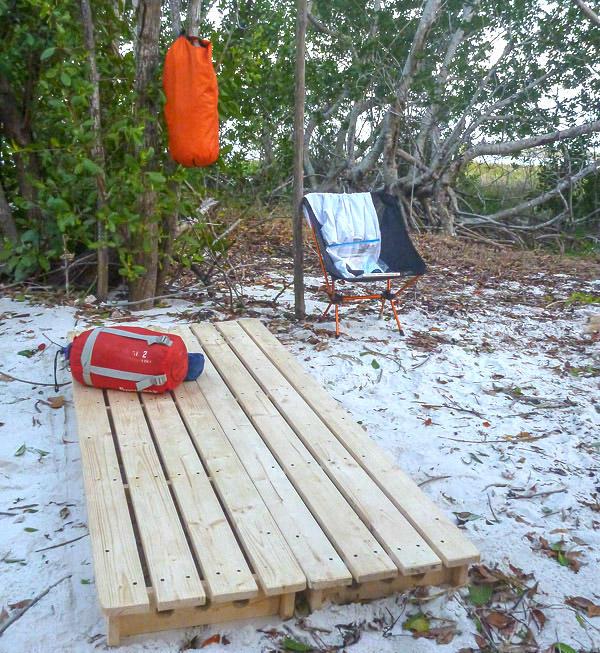
One obvious design element was putting the hakas together to make a sleeping platform. This turned out to be useful when making camp on shore. (Being four inches above the sand makes a big difference!) They were also handy for cooking and just having a clean, dry place to layout gear.
Rabbit Key, Everglades
It happened to be VERY windy (15-30 knots) while I was there, so I had to limit the amount of actual sailing I did. The hakas worked well and I made it back with my sail half reefed. The major problem was the weight (about 27 pounds each). With my gear, water and supplies I was probably at the limit of what the boat could handle. It was also obvious that version 1 was much stronger than it needed to be. Finally, I should have positioned the benches further out so there’d be room to paddle when necessary.
Version 2
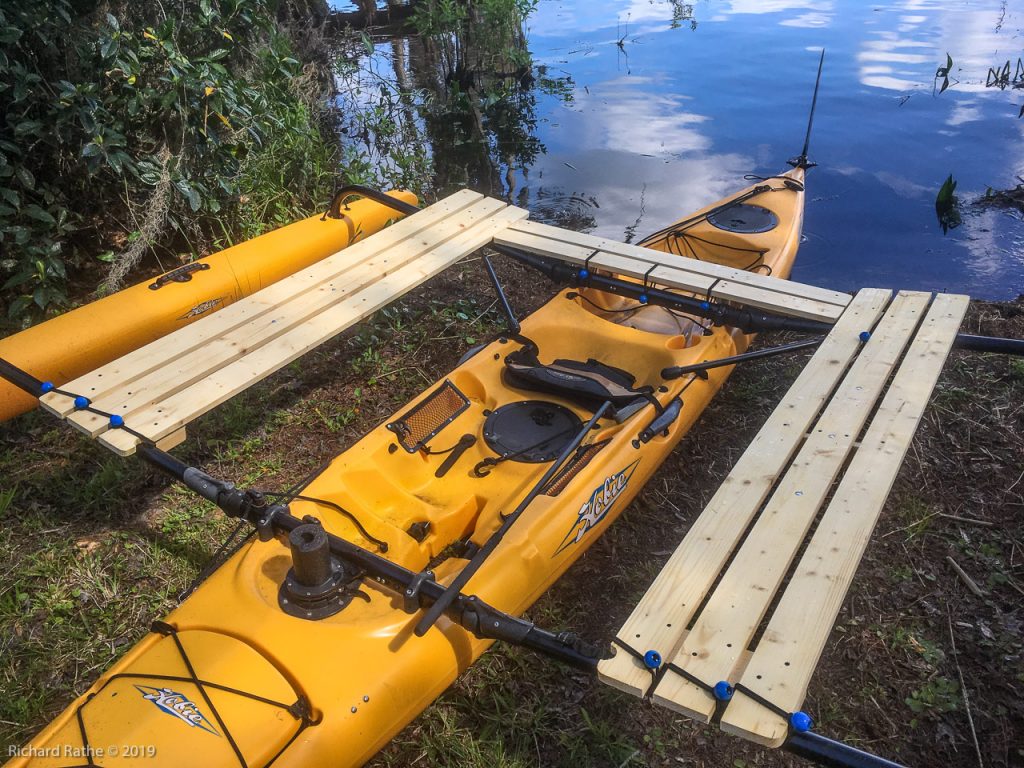
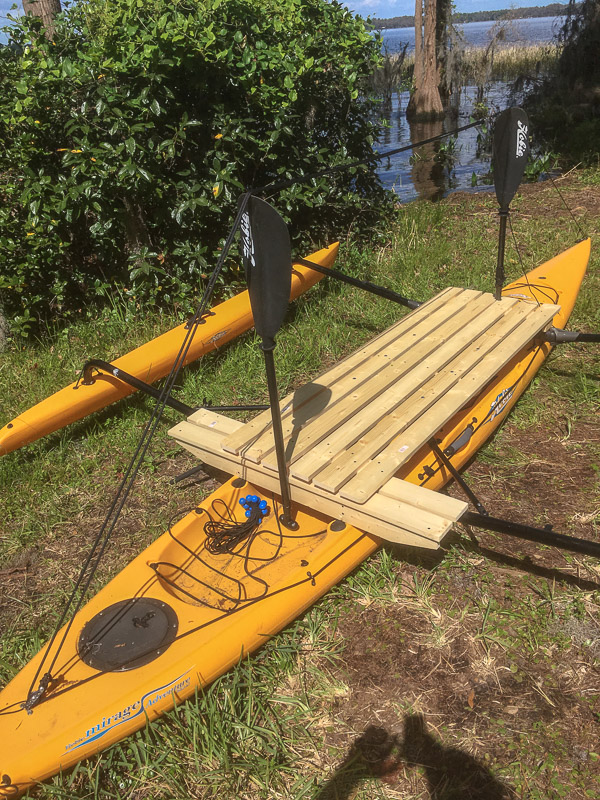
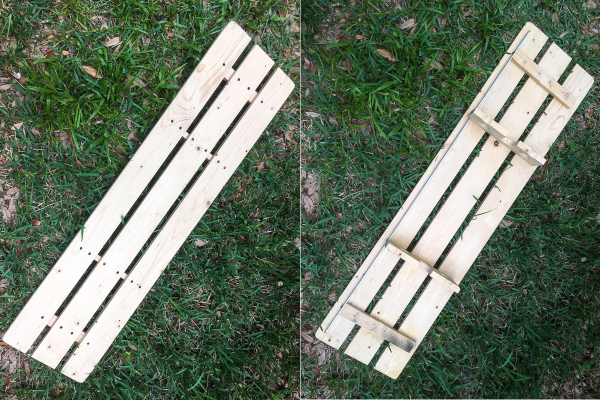
So back to the drawing board! I decided to decrease the width of the benches and nix the undercarriage. I also planned to add a “quarter deck” behind the seat. The complete setup is shown here…
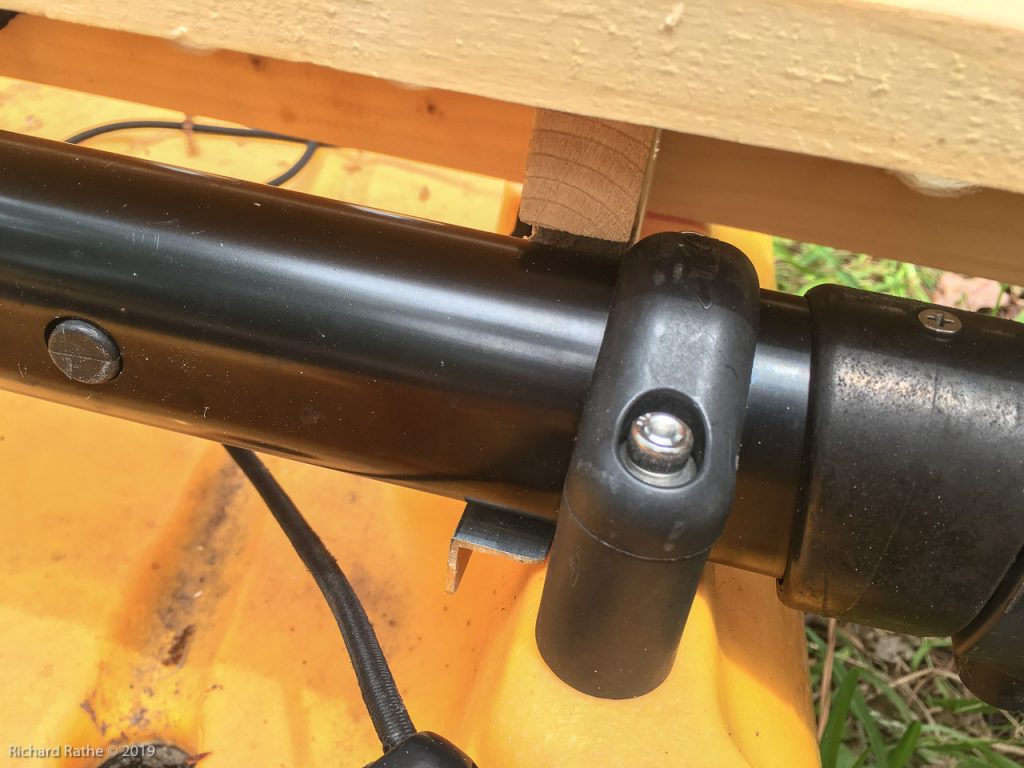
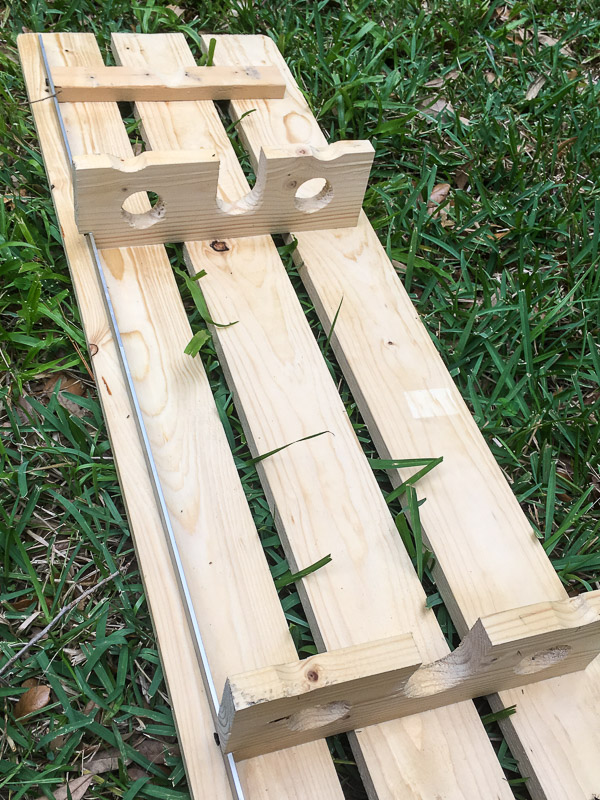
This time I made use of aluminum angle stock in two critical places: 1) I needed a strong “hook” to go under the aft crosspiece to support my weight on the opposite corner.
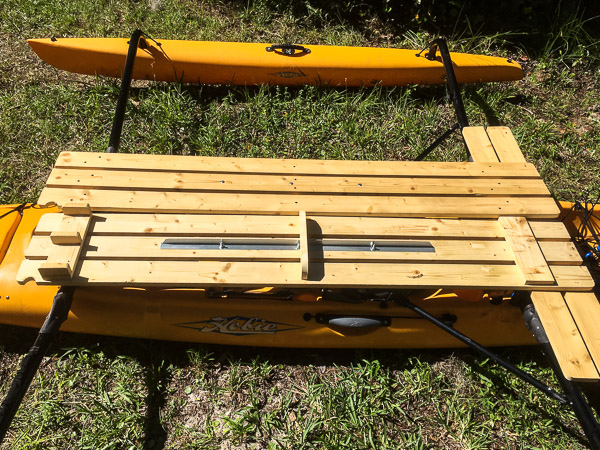
2) The three 3/4 inch planks are not very strong by themselves, so I ran aluminum angle down the center of each bench to help carry the load. They’re still springy but this seems to strike the right balance between strength and weight. (The small blocks seen on the left give clearance for the jam-cleats on the crossbar.)
Here’s the result after my maiden voyage!
It is so much nicer to be up out of the spray and for the first time I was really able to keep the boat trimmed in a strong wind. Notice that I’m using a half paddle. This makes paddling with the sail up much easier.
Camping
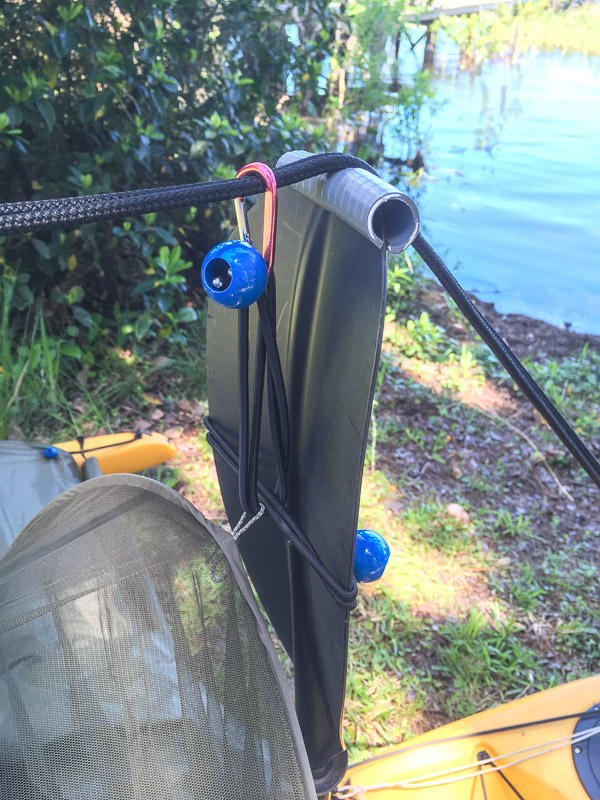
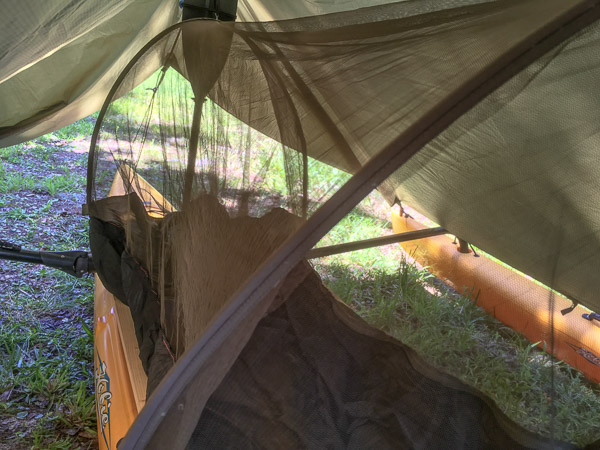
When the two hakas are brought together they make a platform exactly two by six feet. This turns out to be just enough room to lay out a pad and sleeping bag. But what to do about shelter (bugs and weather)? I started with half paddles for the uprights using the mast step for one and the quarter deck to stabilize the other. Then I ran the rope that controls the sail (called the sheet) over the rear paddle and connected it to a rope from the front. This became very stable when put under tension.
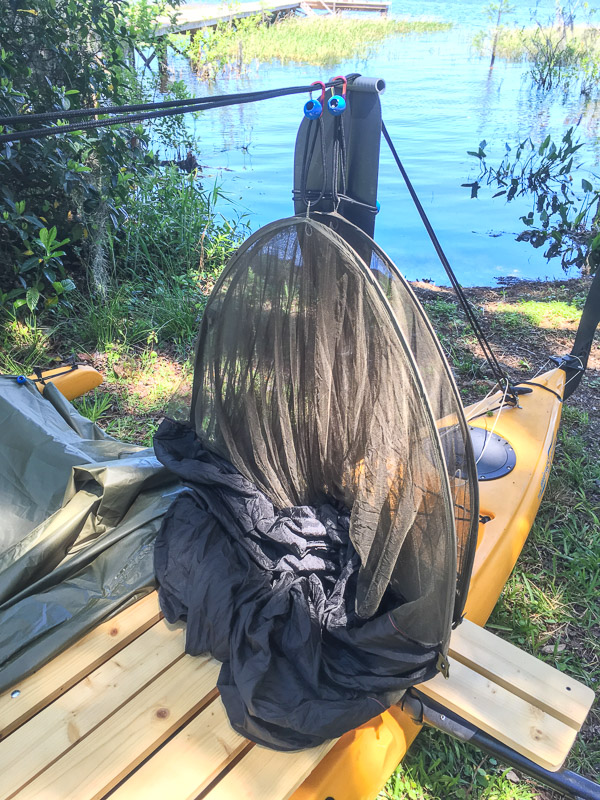
I added small loops to a camping hammock and hung this from the ridge line. (Also shown here are the short pieces of flexible conduit I fashioned to keep the rope on top of the paddles.) After much experimentation I settled on the harness you see here.
This has the added benefit of allowing the whole thing to slide to one end when not needed.
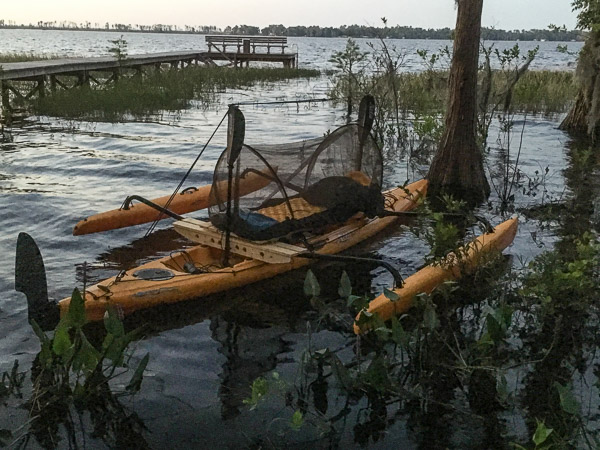
As proof of concept I tied the boat to a tree and slept on the water…
It worked remarkably well. I had enough room to stretch out and nothing got wet! It’s worth noting that the little extensions of the quarterdeck were remarkably useful for getting on and off the boat
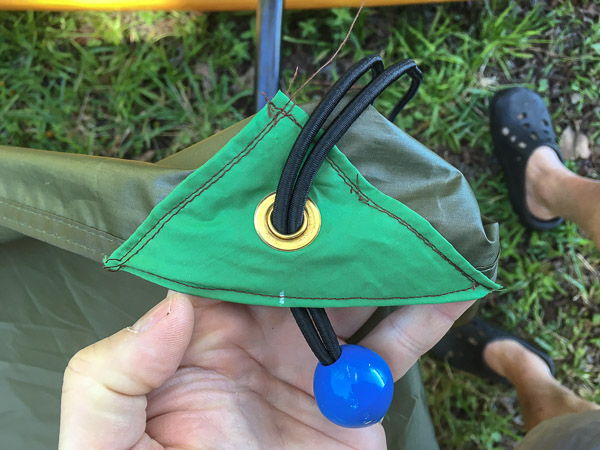
Finally I worked on the rain fly. Starting with a generic 10×10 foot nylon tarp, I added grommets 18 inches from the ends to make it fit the outriggers.
It’s worth noting here that I’m a recent convert to these shock-corded toggles. I used them almost exclusively for this project. I love ’em!
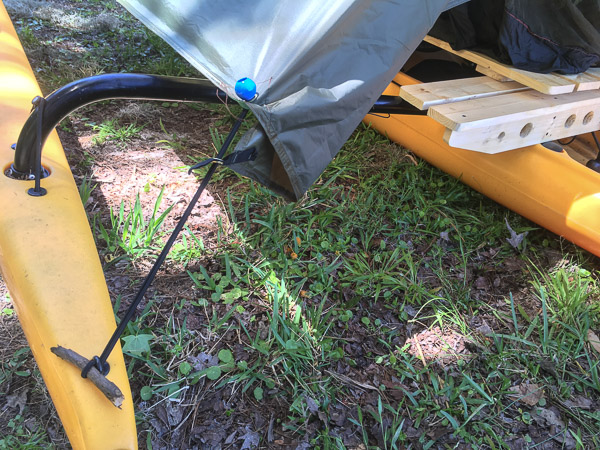
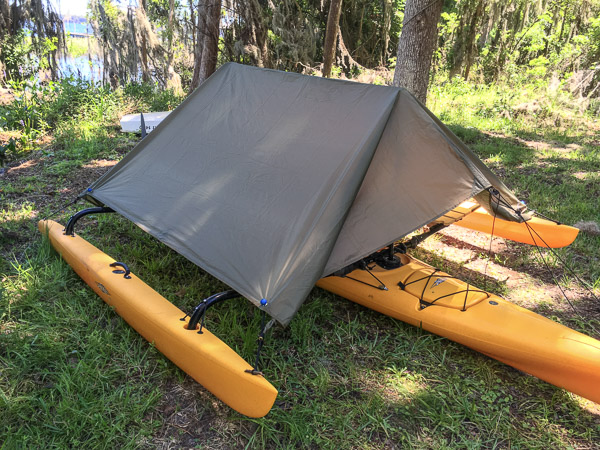
The tarp is supported by the ridge line and tied at the bow and stern. The extra length is folded under to keep it from flapping. This setup is a bit vulnerable to blowing rain on the ends but probably not an issue under normal circumstances (at anchor in a sheltered place).
As you can see, there is plenty of head room inside.
The strengths of this design are:
The quarterdeck and hakas work well together and add to the sailing experience/capabilities of the boat.
The weight is down to about half of version 1.
Almost all the components are dual use, nothing is wasted.
The camping setup is flexible, only use the bits that you need. If there are no bugs or rain sleep out under the stars!
The hakas, hammock and tarp work just as well on shore. In fact all you need are the straps and you have a complete camping hammock with fly!
The main thing I would do differently is a build a larger quarterdeck that straddles the rear crossbar. I’ll add a third plank forward of the other two. This will allow more control of the boat’s trim when I’m not all the way out on the hakas.
Quarterdeck Version 2
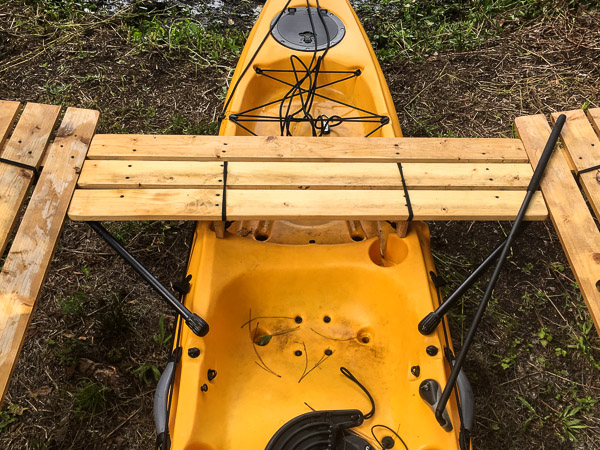
A few weeks later I bought some more 1x4s and built a new & improved quarterdeck to the specifications above.
This design was much better and easier to fit to the kayak. Note the 3/4″ aluminum strip (not an angle this time). I’m not sure this is necessary but it helps support weight when leaning out and back.
Here is the final result after a day of sailing. It fits snugly over the crossbar and the leading edge is supported by the diagonal strut. Eliminating the length-wise cross pieces makes it mostly transparent to the waves, which is a big improvement!