New Hammock 2023

History

For the height of this sort of deliciousness is to have nothing but the blanket between you and your snugness and the cold of the outer air. – Herman Melville (Moby Dick)

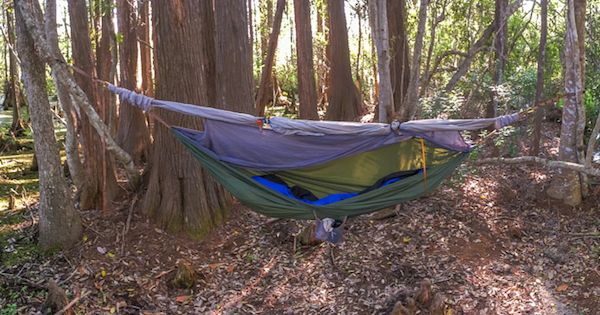
I became aware of Hammock Camping back in 2016. Luckily my first hammock was reasonably well designed and built. Seven years later that hammock has taken me many places and taught me a lot! Unfortunately it is showing some wear and I’ve been looking for a possible replacement.

My Original Hammock
My Original Hammock

One of the things I learned is to keep things as simple as possible. That first hammock was unusual–having a short tent pole spreader at the shoulder (vertical orange bar in photo above). This eliminated the need for tying the hammock out when no rain threatened, and eliminated two extraneous lines to trip over! The rainfly was a standard 10×10 foot diamond with the ridge on the long axis. It also served as the de facto ridge-line when hanging the hammock up. Deploying it took only two stakes and I added some shock-cord to help keep it taut.

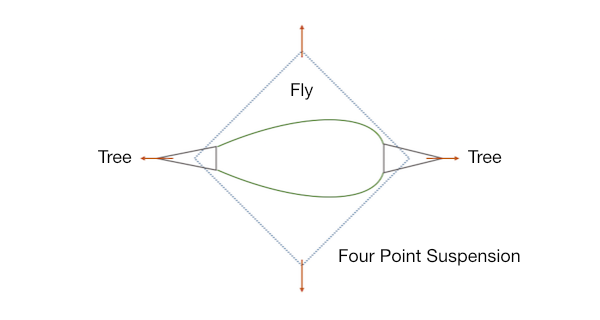
Four Point Suspension

I call this the “four point suspension rule” and it works! Minimal trip hazard–most nights you just hang up and jump in. Even with the fly fully deployed it is easy to enter from any quadrant. I carry a few lengths of lightweight rope to solve minor problems as they come up.

I had to search hard to find a hammock with a single aluminum spreader pole similar to the above. Most “spreader” hammocks have non-removable, self-deploying wands at both ends. This makes them harder to pack up, since you have to fold them in a very precise way. I bought one of these a few years ago and found that it made a better bugnet tent on the ground. It works when hung, but not very well. The spreaders don’t spread, they just support the netting. Newer models appear to have wands closer to the ends and that arrangement might work better. (?)

Setting Up the New Hammock

Spreader and Netting

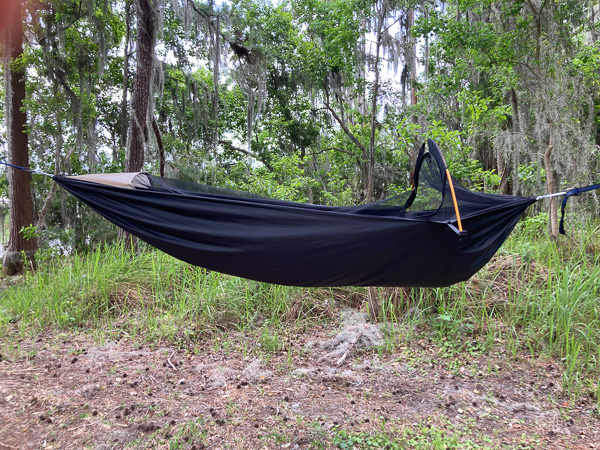
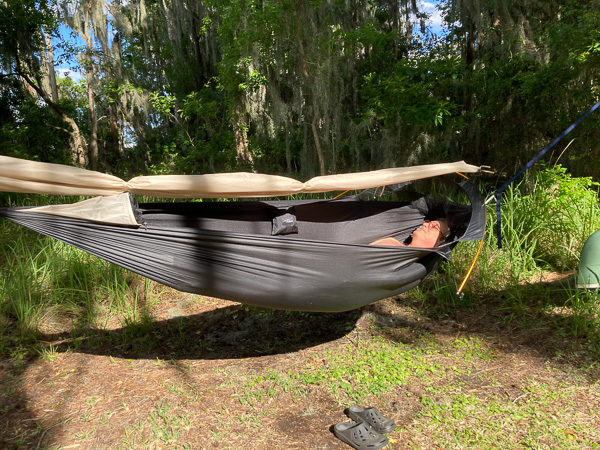
This “TravelBird” hammock looked promising and was not very expensive. The first thing you’ll notice is the spreader pole on the outside (my original had the pole inside the netting). When empty the whole thing tends to tip over in the wind. Not so much with gear in it. (The video instructions tell you to stake it out, but there really is no need to do this.)

New Hammock
New Hammock

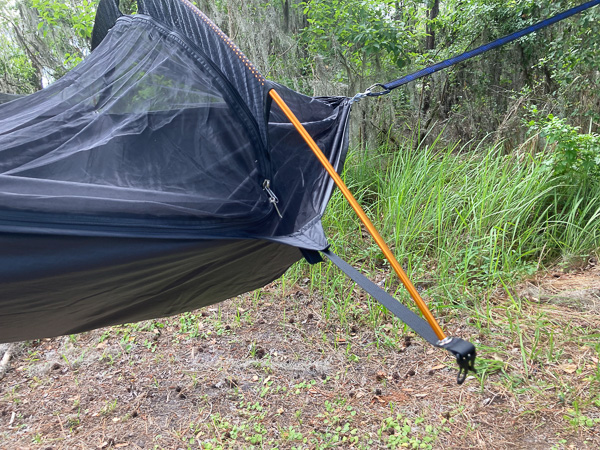
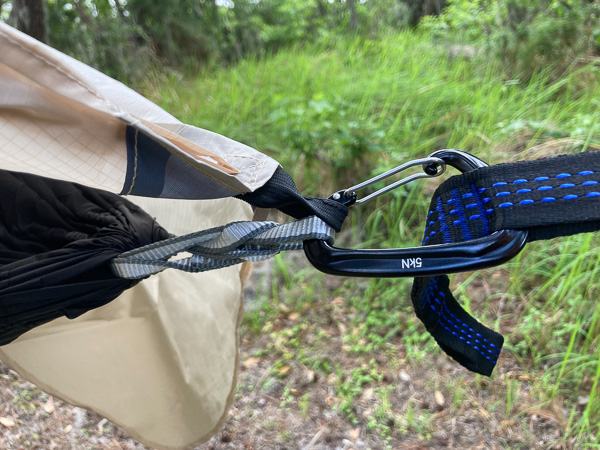
Here’s a closeup of the spreader in action. You can also see the standard carabiner suspension and entry zipper. Note that these are not the supplied straps, which are two feet shorter and could not span the distance between my “hammock testing” trees.

Hammock Spreader
Hammock Spreader

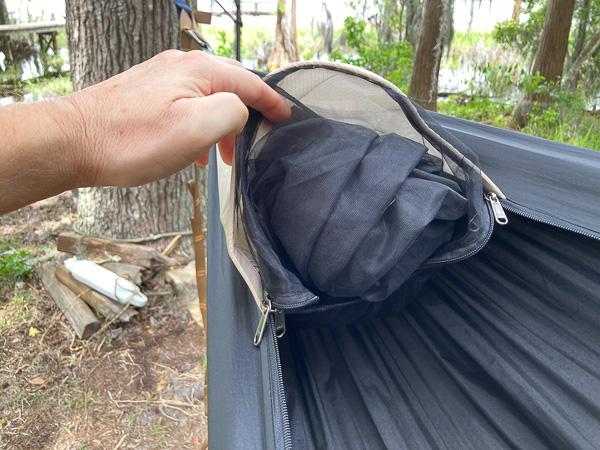
Note that you can enter from either side, and the netting folds away into a pocket at the foot when you don’t want it. (Nice!) The dark netting is also better for stargazing at night.

Hammock Netting Folded

When you lay down in the hammock the spreader bends and keeps quite a bit of tension under your shoulders. I’m still experimenting with proper pitch for the most comfortable effect. My only major complaint–at only 100 inches it’s too short. It should be 104-106 inches IMO. I’m 6 foot 2, so if it works for me it will probably work well for anyone who is shorter.

Inside Hammock Pano
Inside Hammock Pano

Rainfly

The rainfly is a custom shape and the spreader supports it just like a modern tent. The problem is the inadequate ridge-line tension using the weak elastic tabs on the ends. I re-engineered this with some shock-cords that tighten the fly and allow it to rise above the netting for better airflow.

Weak Fly Attachment
Weak Fly Attachment

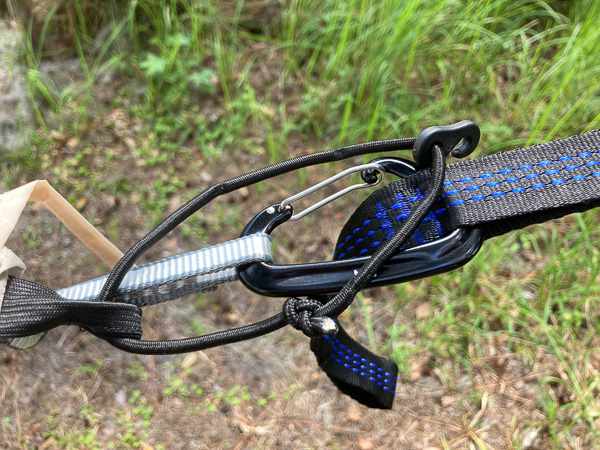
I added a six inch shock-cord loop and hook.

Better Fly Attachment

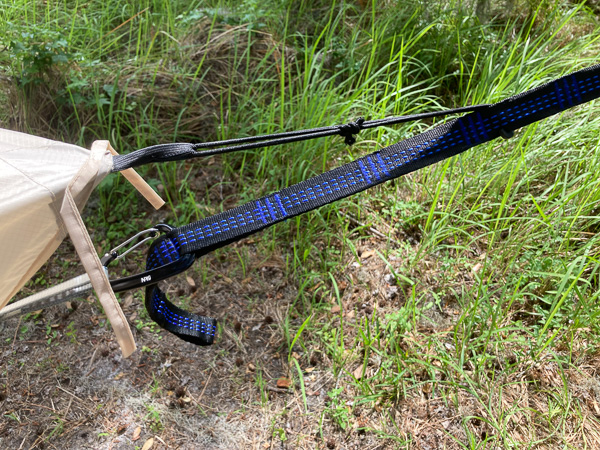
As you can see there is more tension on the fly. And when the hammock is loaded the fly can better maintain both height and tension.

Fly Under Tension
Fly Under Tension

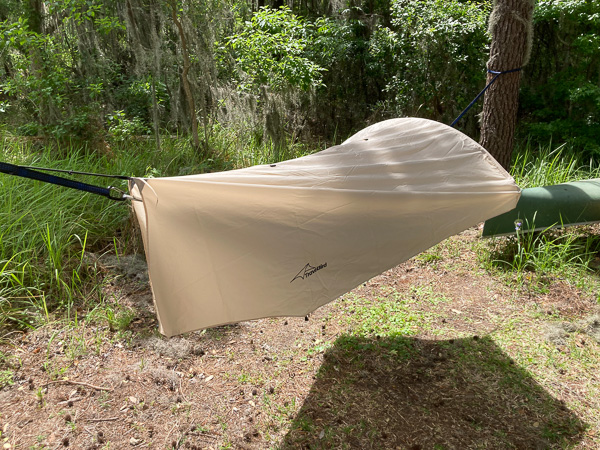
The fly can be tucked on both ends to keep out blowing rain. This works very well!

Fly Tucked Under
Fly Tucked Under

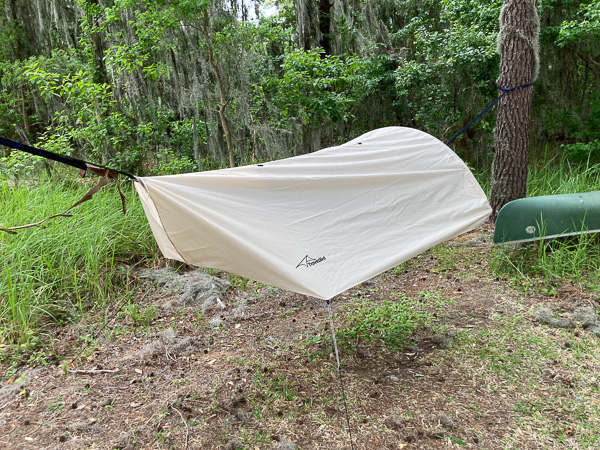
I’ve found that in many situations the foot can be left lightly tied or loose. The side pull-out tabs can be tied to each other as shown below (black tabs near the ground).

Loose Footed Fly
Loose Footed Fly

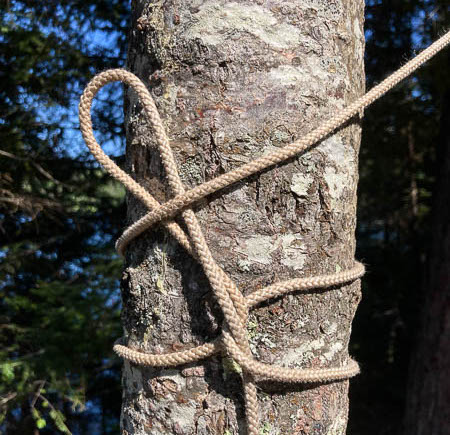
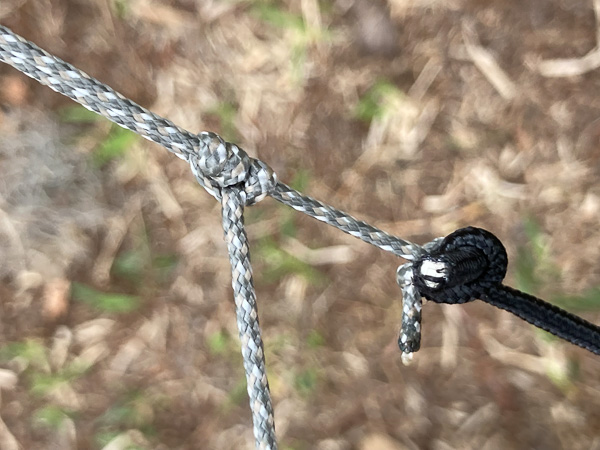
If more wind is anticipated you can stake out the fly as shown below. The hammock came with thin elastic cords that I replaced with heavier shock-cords and lightweight rope. (The knots are an adjustable Taut-Line Hitch and a Zeppelin Bend to connect cord to rope.)

Hammock Knots
Hammock Knots

The final result meets the four point rule outlined above, and keeps the head and sides clear of ropes!

Staked Out Fly
Staked Out Fly

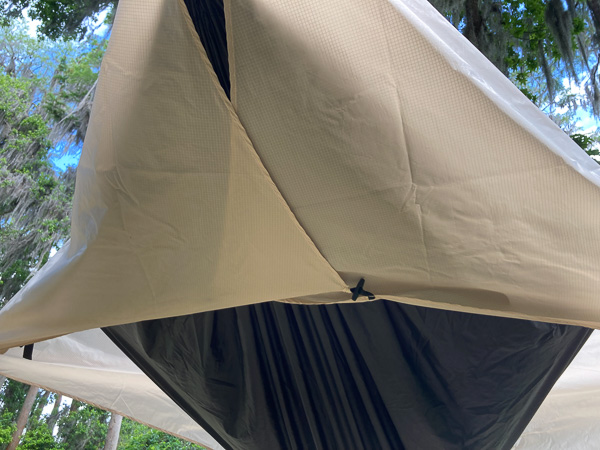
If you want to hedge your bet you can reef the fly along the ridge-line. This also makes it easy to pack up when you’re breaking camp. Note that one of the reef points was not sealed properly and caused a minor leak. I will be adding some seam sealer to address this.

Fly Reefed at Ridge-Line

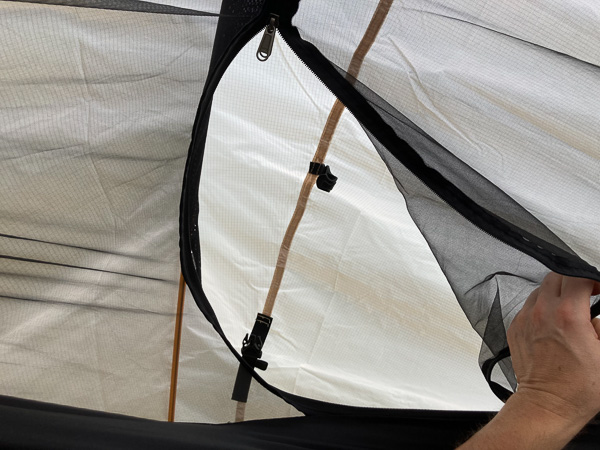
Note that this is the first hammock I’ve seen where you can access and deploy part of the rain-fly from the inside!

Fly Access from within the Hammock

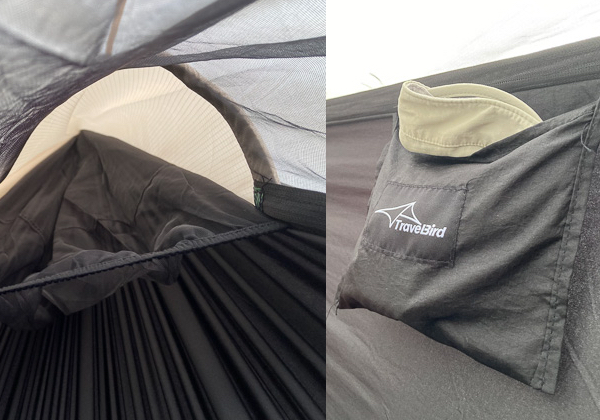
There are two pockets, one at the foot and one along the right side. As always, I wish there were more pockets and larger. A “loft” near the head would also be helpful.

Hammock Pockets
Hammock Pockets

Recommendations

  • PROS
  • a good hammock overall, at a great price (~$69)
  • single external pole design, fewer ropes!
  • enter from either side
  • netting folds out of the way
  • dark netting is good for stargazing
  • CONS
  • too short (needs 4-6 inches more IMO)
  • rainfly needs better suspension (easy to fix)
  • included hanging straps are adequate, but short
  • no ridge-line, so harder to hang (minor)
  • side-zipper bag included, a stuff sack would be better
  • no instructions, videos are not that helpful

Inflatable Kayak Review

Advanced Elements Expedition Elite Kayak

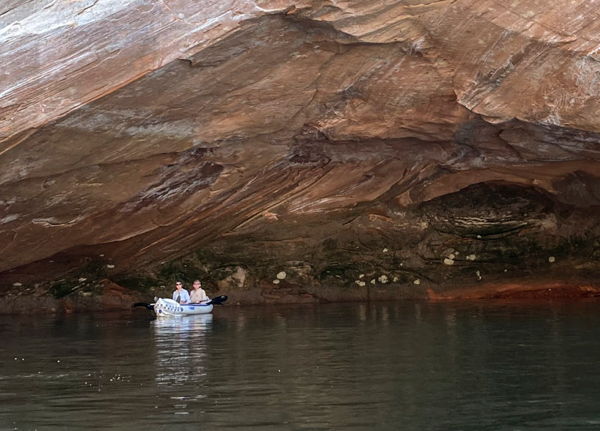
I’ve used a “traditional” inflatable kayak for several years, mostly in special situations such as houseboat camping or floating down rivers. They can be very practical and lots of fun in these settings. They are bouncy and sit high in the water, more like life-rafts than kayaks. The one thing they are not good for is a windy day on open water!

“Sea Eagle” Kayak on Lake Powell 2020

So I was intrigued when I read about newer designs that approximate the capabilities of hard-sided kayaks. Advanced Elements produces several models including the Expedition Elite reviewed here.

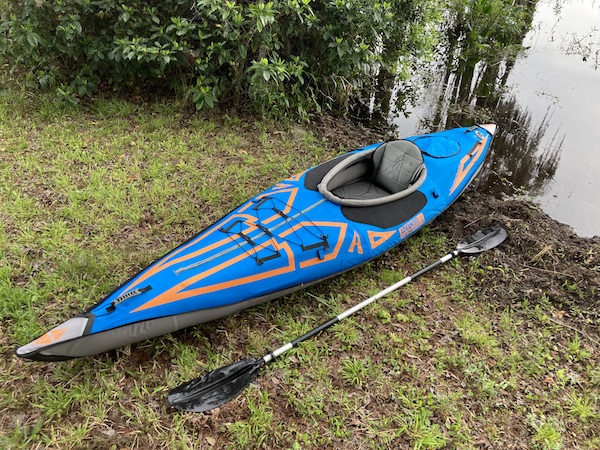
Expedition Elite Kayak

The boat is nominally 13 feet long and weighs in at around 42 pounds (not as heavy as it sounds when you consider the design). It is rated to carry up to 400 pounds. The materials, fit, and finish are all very good to excellent. I’ve had a chance to use this kayak in 20 mph winds on a large lake, and on a small river with minor rapids. It performed well in both situations.

There are several notable design features:
1) Short aluminum frames define the prow and stern.
2) The drop-stitched floor is very rigid (similar to a standup paddle-board).
3) Two concentric floatation chambers (rings) provide redundancy in case of damage/air loss.
4) Seven auxiliary inflatable compartments define the semi-rigid deck.
5) An outer envelope gives the boat shape and protects everything else.

There are a total of eleven separate inflatable elements when you include the seat and optional rear “thwart”. Only three of these provide primary floatation (the outer ring, inner ring, and floor). Inflation pressure is low (1-2psi) except the floor (4-5psi). All components noticeably lose some pressure after a day or two. It takes a bit of effort to keep everything topped off.

The entire kayak (potentially including the pump and paddle) folds up into a suitcase-sized duffle. I’ve had some difficulty folding and unfolding it smoothly. When folded there are six or more layers that must slide over each other without binding. Inflation leads to asymmetries that make me think I’ve done something out of order. There is an example in the photo below where you can see the right inner ring bulging towards the midline. I’m not sure if this is some subtle configuration problem or the boat is just built that way. These are minor aesthetic issues to that don’t appear to affect performance.

Other Details

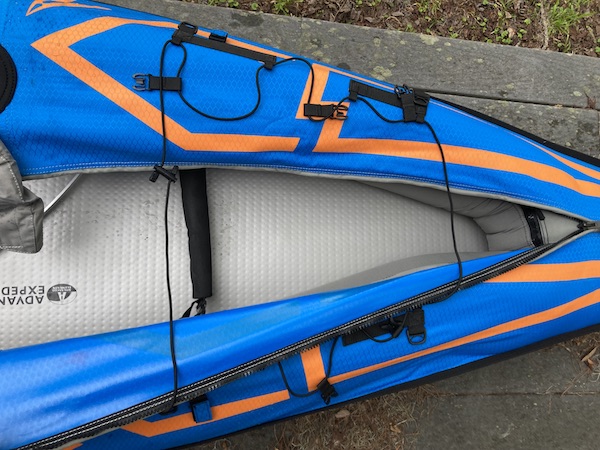
I’m over six foot tall and this kayak is just barely big enough for me to get my legs in. The photo below shows the bow zipper opened to reveal the adjustable footrest and limited storage space beyond. (Also note the dimples of the drop-stitched floor.) The more substantial rear storage area has a clever hatch that rolls up like a dry bag.

Bow Zipper Open

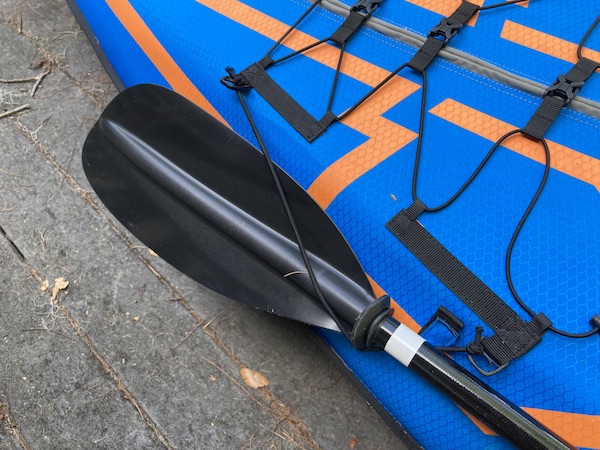
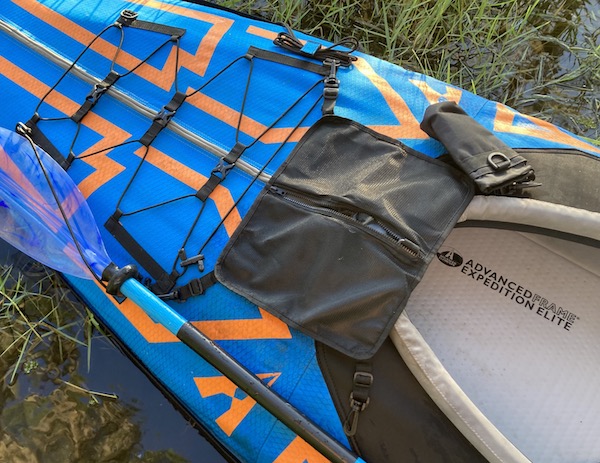
The biggest deficiency/flaw so far has been the position of tie-downs for the paddle and gear. There are two velcro attachment points on each side for holding a paddle, however the forward points are too far away to be useful. I remedied this by tying a short length of shockcord between the existing d-rings. The other end of the paddle fits nicely into the rear velcro strap.

Improvised Paddle Rest

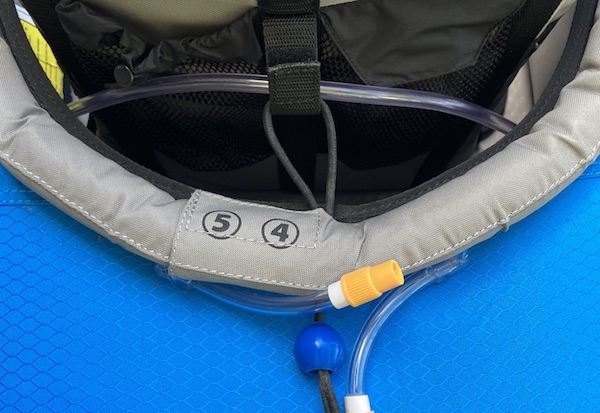
Another irritation was the seat falling out when I picked the kayak up to move it. There was no attachment behind the seat so I added one using an elastic toggle.

Toggle Threaded Thru Hole Behind Seat

I have a similar problem storing small gear. My other kayaks have easily accessed cubbies for gear and slots for water bottles. Again the attachment points on this boat are all too far forward. I’m thinking of adding d-rings to the black side panels to attach a deck bag.

Proposed Deck Bag Location

Bottom Line

Pros

  • Lightweight compared with plastic or fiberglass equivalents.
  • Subjectively 80% of the feel and performance of a hard-sided kayak.
  • Less vulnerable to waves than you’d think. (An optional skirt is available.)
  • Enough floatation to carry a significant amount of gear.
  • Very portable. Packs into a single duffle!

Cons

  • Leg area somewhat cramped for taller paddlers.
  • Gear attachment issues outlined above.
  • Need to top off inflation frequently.
  • Complicated, many parts that can move in or out of place.

Overall this is a very functional kayak, even compared with hard-sided models. The combination of partial frame and drop-stitched floor give it a solid feel on the water. Plus you can carry it in the trunk of your car and store it in the back of a closet!

Kammok Mantis Camping Hammock Review

This is my third hammock tent. I hit a lucky home run with my first no-brand hammock tent. It’s somewhat non-standard (arched tentpole, no ridge line). I have improved it with several mods and it has served me well on many trips.

My second Hennessy model was a disappointment on several fronts, most notably the ridiculous knot-based attachment to the tree straps. Give me carabiners any day! I’m also not impressed by the asymmetric cut, especially the fly.

The Kammok Mantis is most notable for the superior materials used. My favorite is the “night sky” bug net material, which nearly disappears on dark starry nights. The hammock fabric feels very light and sturdy, while having a slight texture that makes it less slippery. The fly is made from an extremely light waterproof fabric. It all goes into a very small package.

Weight 2 lb 11.5 oz (per Kammok website)

The Basics

Minimal Hang without Stakes
With Fly & Four Point Stake Out

The stuff sack is integrated making setup and takedown very efficient. I’m less thrilled by the fly however, which is supposed to be folded many times and put into a little sidewall pocket in the stuff sack. The best I can do is 2-3 folds, then roll and stuff. The lines tangle unless you roll them up individually. I think a single snakeskin might improve this (see below).

Inline Stuff Sack

The hammock is useable without staking out the sides, but I’ll probably stake/tie out the wings in most settings. (I’m a bit spoiled because my first hammock has an aluminum tentpole spreader to keep the netting away from your face and upper body.) The fly is tapered with less coverage at the foot and SIX (!) tie down cords (in addition to the two that hold the peak). I can’t help thinking a simple diamond fly would have been better.

Critique and Improvements

The fly is too complex IMO. Staking out all six tie-downs guarantees you’ll trip over them at some point! It’s like a spider’s web. As an alternative I came up with this “tucked fly” approach. (I’ve already used it in a moderate rainstorm and it worked well!)

Two Stake Setup with Tucked Foot
  1. Connect the fly ridge line to the highest rung on each strap (no need to go around both trees twice!).
  2. Stake out the hammock and the fly head to a single stake on each side.
  3. Loosely tie the foot ends of the fly together, and possibly to a rock, branch, waterbottle, etc. on the ground.

This improves things quite a bit. There are now only two trip zones and it is easy to access the hammock from either side. The foot end fly becomes more of a tunnel with plenty of sidewall. I think it may be more wind resistant. There is still plenty of room for air circulation…

“Tucked” Foot & Underquilt

The final piece of the puzzle is to compensate for the slight dip in the fly when the hammock is occupied. (This is something I worked out with my first hammock, completely replacing the tie-out ropes with elastic shock cords.) For this hammock I simply added elastic loops to the ends of the four corner ropes. This keeps everything nice and tight and helps the fly spill wind.

Fly with Shock Cord Loops

Aside: Underquilt

While not specific to this hammock, I recently purchased a generic underquilt for those cold nights. It really works well! You can see the extension cord with tensioner knot I added in the photo above. This is what it looks like with the fly off…

Staked Out with Underquilt

Conclusions

Overall this is a great hammock! It is certainly the lightest three season tent I’ve ever owned. Features I’ve not yet mentioned are: pockets for small gear in the wings (see glasses lower left above), tensioner toggle for each line, entrance from either side, completely removable bug net, and an option to replace the net with a “tent top” for winter camping.

That said it came to me from REI with slight damage and a manufacturing defect. =(

“Stray Needle” (?) Damage to the Fabric

The first thing I noticed when inside the hammock were these two rather large holes in the end. Not exactly bug proof! On investigation I determined that the little flap on the outside had been attached to the wrong line (you can clearly see this in the screen capture I took from a how-to video and examples on the Kammok website). Easy to fix.

Mysterious Hole at Both Ends?
Permanently Open Flap?!
What Flap Should Look Like (source:youtube)
Fixed!

I experimented packing the fly with the snakeskins from my other hammock. This worked well, but ideally it should be a single skin sewn to match the shorter, less bulky fly. Future project perhaps?

Fly Only in Snakeskins

Finally, I made a passible “loft” from an abandoned tent piece I found on the ground. It is not quite square, so does not quite form a diamond, but it seems to work!

Abandoned Tent Loft with Modifications
Jacket & Hat in the Loft