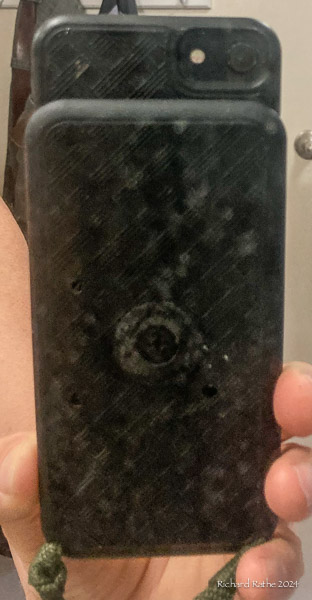
I’ve used two-part “holster” cases for my phone over the past ten years. Now that phones are nominally waterproof I converted one into a neck strap phone holder for sailing, kayaking, canoeing, etc. This is a vast improvement over the “bag” cases which protect the device from water (not needed) but degrade the camera (not acceptable).
The first thing I did was cut off the belt clip with a hacksaw. The result is not pretty but nobody’s going to be looking at it! [Aside: I really don’t like belt clips. They are often uncomfortable and a good way to lose whatever you have clipped!]
Sawn-Off Clip
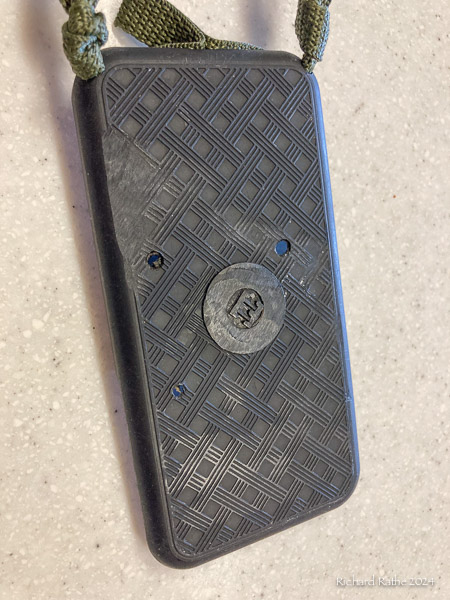
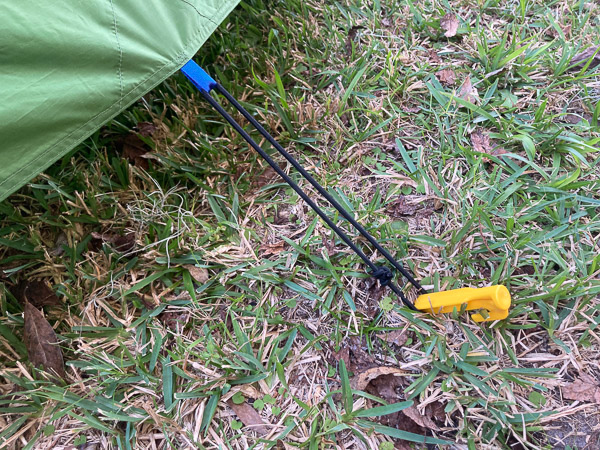
My initial effort used light paracord as shown below. The rope was a bit uncomfortable on my neck. I added a bit of clear tubing as a guard but this did not help much. Note the Breakaway Knot (sometimes called an anti-garrote knot!). It is designed to fail with a stiff pull when the strap catches on something so I don’t get strangled!
Version 1 w/ Rope and Guard
My take on a breakaway knot is pretty simple. It’s just a Double Overhand Knot (a simple knot with an extra turn) with a loop from the other end tucked through it. I’m not sure I’ve seen exactly this configuration before, but every breakaway knot I’ve seen has some sort of “constrictor” knot on one end with an open loop passing through it. I like this design because it is easy to tie and lies flat.
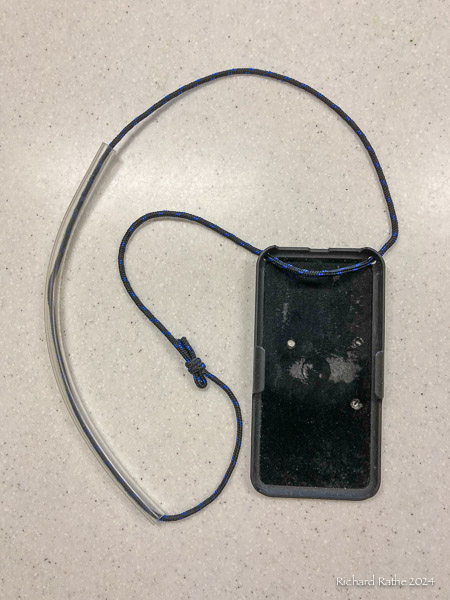
I purchased some bulk polyester webbing and tried again. This was much more comfortable! One difference I found was the knot was easier to break. Just proves that knots behave differently depending on what material they’re tied in. I think it is adequate but time will tell?!
Version 2 w/ Webbing
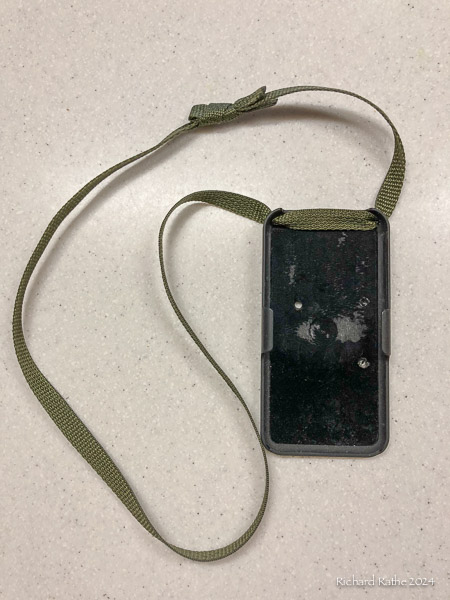
Then there’s the issue of attaching the phone securely when it is not around my neck. I reworked my design with a small sewn loop and two simple knots as show here. Turns out the little loop was unnecessary but I like the way it looks. Anything tied between the two knots would break the case material before it detached!
Version 2.1 w/ Webbing and Secure Loop
The phone hangs upside down so I can pick it up and view the screen right side up. The case is friction fit so I just slide the phone in our out. To take a photo or use the flashlight I just pop it up about 20%. You can reverse the phone and completely cover the screen if needed (blowing sand?) but this exposes the camera lens.
Pop-Up Camera & Flashlight
Two Thoughts: 1) There is very little written about breakaway knots, but they are clearly useful; & 2) Why, why, WHY don’t phone cases routinely cover the camera len(s)?! This particular case could have a little nub of plastic sticking down to cover the lens when the phone is fully engaged—but it doesn’t.
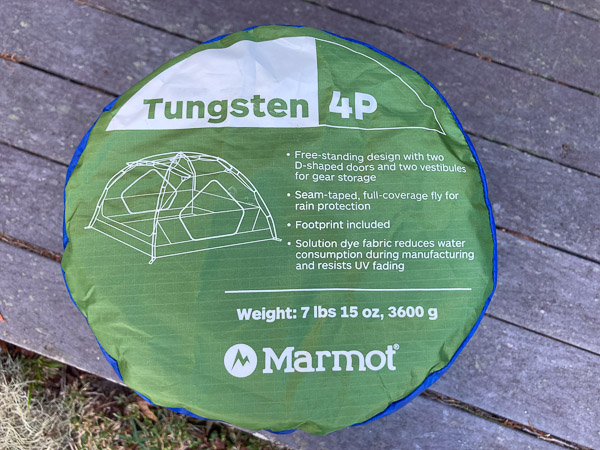
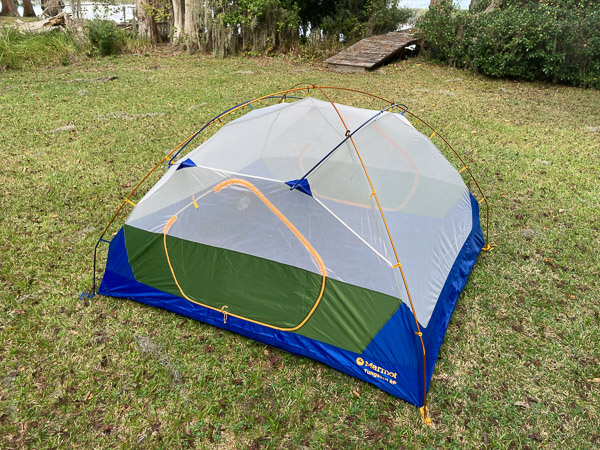
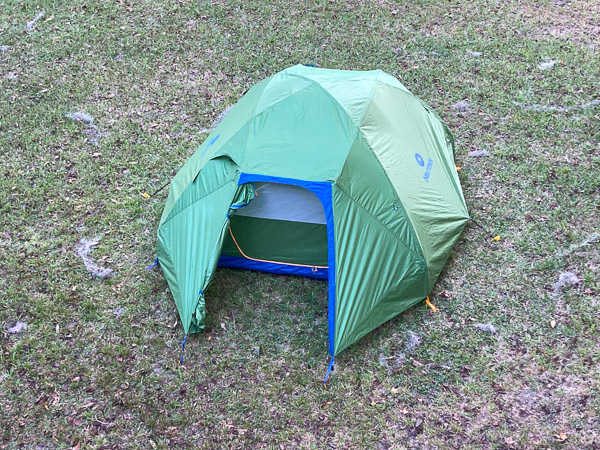
Here is my “unpacking the box” review of the 2023 Tungsten Four Person Tent from Marmot.
Overall the materials and workmanship appear to be excellent.
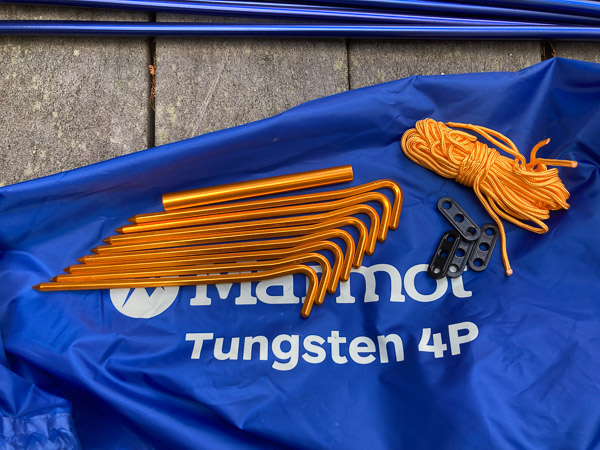
Tent Bag Label
Basics
This is a classic “dome tent” with a rectangular floor and several features of note…
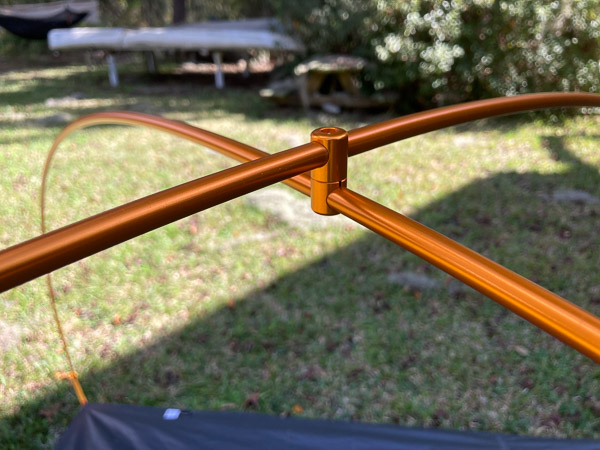
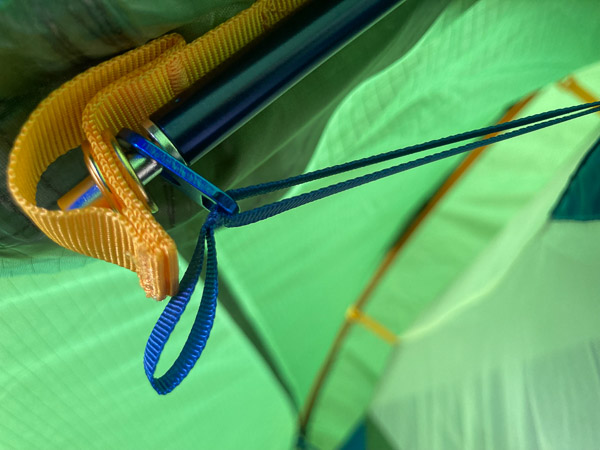
Lightweight aluminum poles define the four corners and are connected by a hinge at the peak. The segment nearest the ground is “pre-bent” to keep the sidewalls near vertical. Two end sections are blue to help guide setup.
Tent Pole Hinge
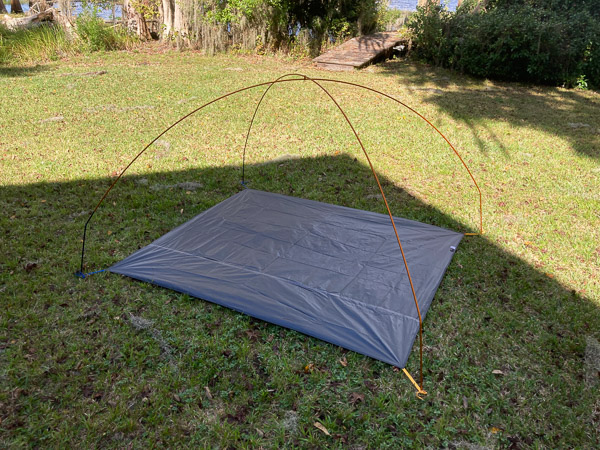
You can erect the basic structure with only the “footprint” (aka custom ground cloth). This is nice and not possible with many tents. It creates a stable clean surface to unfold the tent itself. It does not seem possible to put up the fly without the tent (if it’s raining or as a sun shelter).
Tent Poles and Footprint
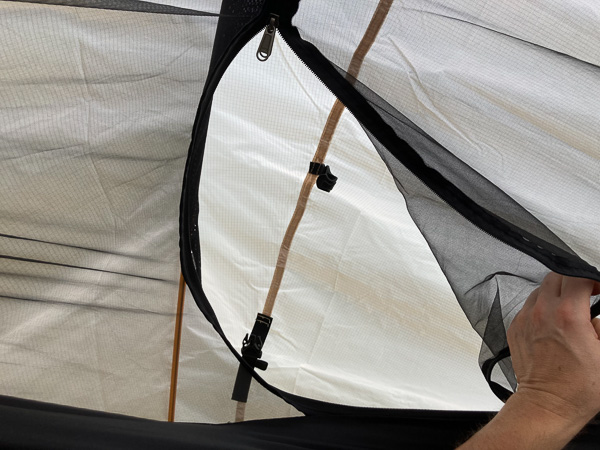
The tent walls clip onto the frame easily, followed by the cross-poles. These pull out the door panels yielding near vertical sidewalls. I really like this design. Many similar tents have a single cross-pole, with less door clearance and stability.
Basic Setup w/o Fly
At this point you have a reasonably strong free-standing tent that you can move around as needed. Note that no stakes were needed up to this point (on a non-windy day).
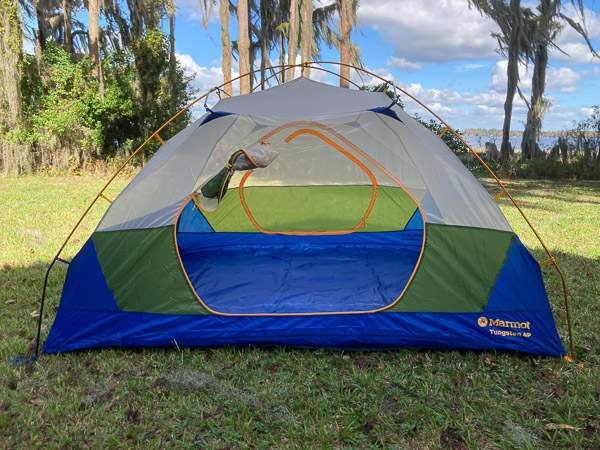
Interior and Doors
The large doors are identical. There are four traditional small gear pockets near the corners and two “headlamp defuser” pockets in the ceiling. There are also four attachment points around the peak so a gear loft would be possible (but not included).
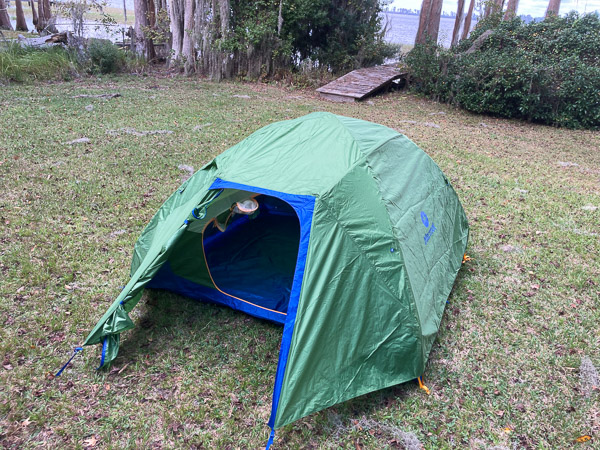
Fly Setup
The fly is a standard “staked-out vestibule” design. It takes four stakes (or rocks, tree roots, etc.) to fully shape the fly. Again note that the fly door is wide and crosses the midline. This would not be the case with a single cross-pole. There are two small pop-out vents in the fly, one next to each door. It remains to be seen if these are adequate when the doors are completely closed. It is not obvious if the doors can be rigged partially open.
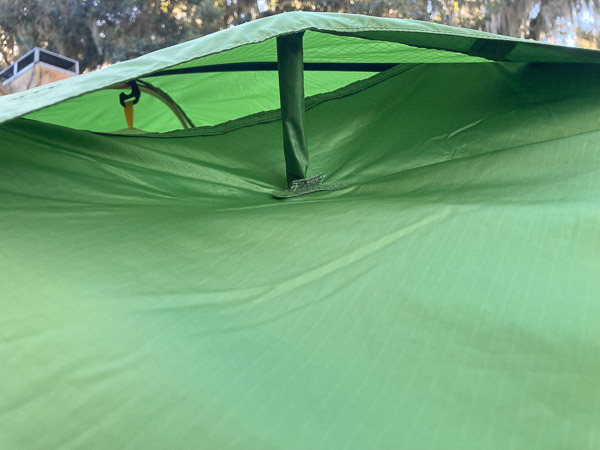
Vent in Fly
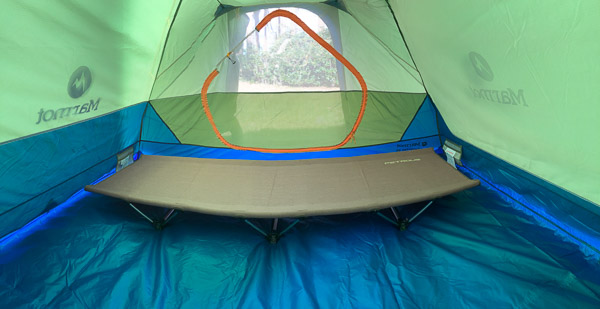
This slightly distorted panorama should give you an idea of the interior size. When car or beach camping I bring lightweight cots as show here. For two people, each with their own door, this tent is palatial! It would be confortable for three, but very cramped for four adults.
Tent Interior with Cot
Specifics
I discovered three things that were not obvious and not documented as far as I can tell.
First, if you look at the panorama above, notice the left sidewall is higher than the right. It is unclear to me why this is so?
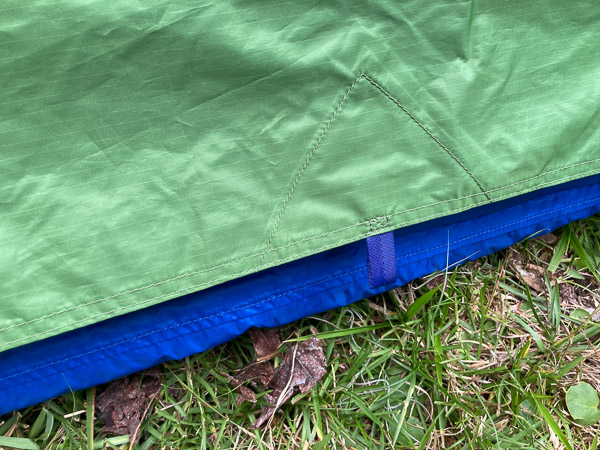
Next, there is a second set of four grommets under the fly that should be positioned over the ends of the cross-poles (gold webbing in photo). These are very hard to find unless you know where to look!
Grommets Under Fly
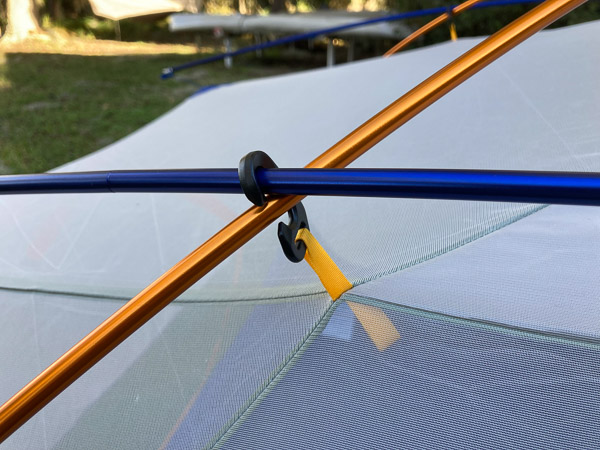
The third is to engage the large black clips over both poles where they cross. This doesn’t affect the fly, but gives the entire tent structure more stability.
Large Clips over Both Poles
Oddments
With respect to ventilation and water intrusion, the non-door sides of the fly have small tabs for staking out. This is a very common design feature that is often ignored in the field.
Fly Side Pull-Out
My approach over the years is to tie short loops of bungee cord to these tabs. This makes it easier to stake out the sides and keep them taut. Water is forced away from the floor/sidewall and ventilation is greatly improved!
Fly Side Staked-Out
Here is the tent fully deployed with four stakes on the ends and two on the sides. With the addition of the side stakes this becomes a very stable structure and is likely to perform well under windy conditions.
Fully Staked-Out – Note Vent Left of Door
The hardware that comes with the tent is minimal: eight stakes, four 6ft lengths of cord, and an emergency pole repair sleeve. Many online commentators have pointed out that there are not enough stakes to fully secure the tent (no stakes for the pole tie-outs and sides). This is less critical than it seems. First it is rarely necessary to stake down every possible point. Second, it is often necessary to augment the generic stakes with sand-screws or other specialized substitutes (like tying to a rock or tree root).
For the height of this sort of deliciousness is to have nothing but the blanket between you and your snugness and the cold of the outer air. – Herman Melville (Moby Dick)
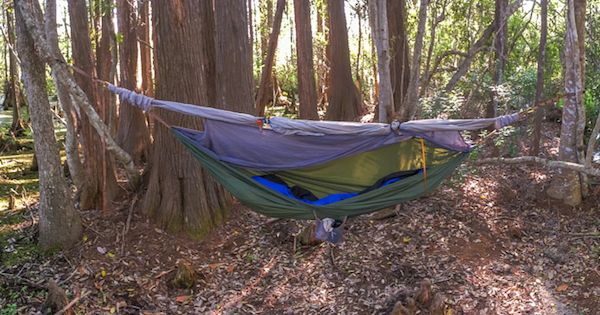
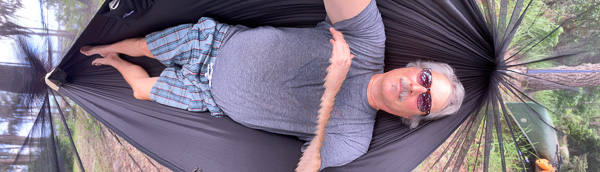
I became aware of Hammock Camping back in 2016.
Luckily my first hammock
was reasonably well designed and built.
Seven years later that hammock has taken me many places and taught me a lot!
Unfortunately it is showing some wear and I’ve been looking for a possible replacement.
My Original Hammock
One of the things I learned is to keep things as simple as possible. That first hammock was unusual–having a short tent pole spreader at the shoulder (vertical orange bar in photo above). This eliminated the need for tying the hammock out when no rain threatened, and eliminated two extraneous lines to trip over! The rainfly was a standard 10×10 foot diamond with the ridge on the long axis. It also served as the de facto ridge-line when hanging the hammock up. Deploying it took only two stakes and I added some shock-cord to help keep it taut.
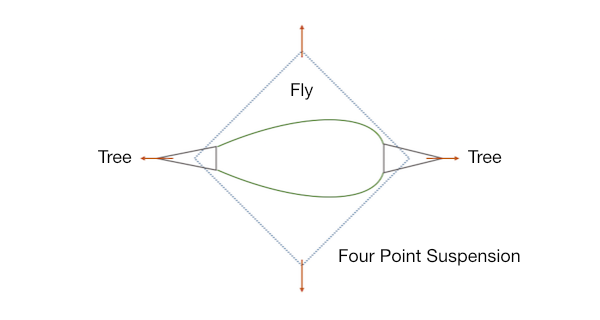
Four Point Suspension
I call this the “four point suspension rule” and it works!
Minimal trip hazard–most nights you just hang up and jump in.
Even with the fly fully deployed it is easy to enter from any quadrant.
I carry a few lengths of lightweight rope to solve minor problems as they come up.
I had to search hard to find a hammock with a single aluminum spreader pole similar to the above. Most “spreader” hammocks have non-removable, self-deploying wands at both ends. This makes them harder to pack up, since you have to fold them in a very precise way. I bought one of these a few years ago and found that it made a better bugnet tent on the ground. It works when hung, but not very well. The spreaders don’t spread, they just support the netting. Newer models appear to have wands closer to the ends and that arrangement might work better. (?)
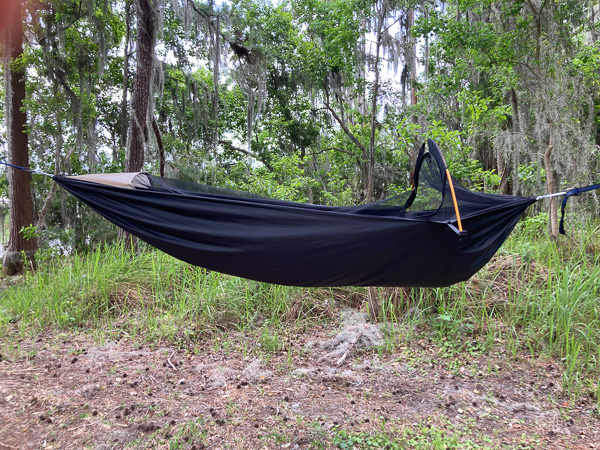
Setting Up the New Hammock
Spreader and Netting
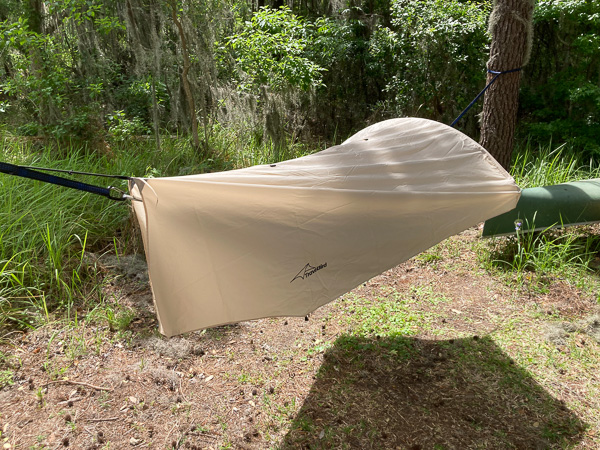
This “TravelBird” hammock looked promising and was not very expensive.
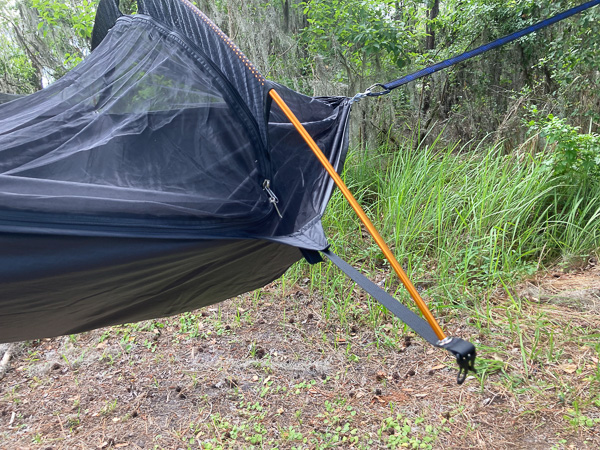
The first thing you’ll notice is the spreader pole on the outside
(my original had the pole inside the netting).
When empty the whole thing tends to tip over in the wind. Not so much with gear in it.
(The video instructions tell you to stake it out, but there really is no need to do this.)
New Hammock
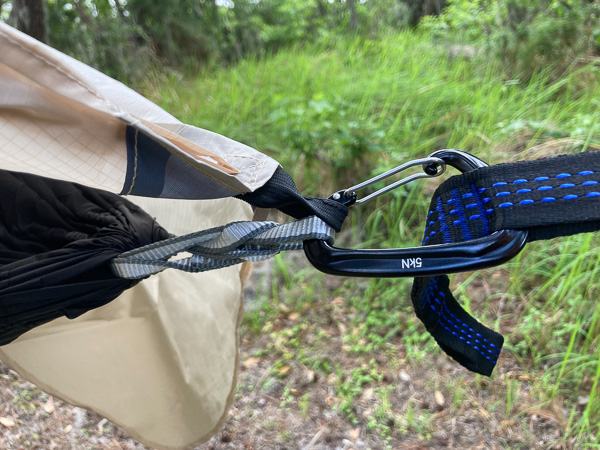
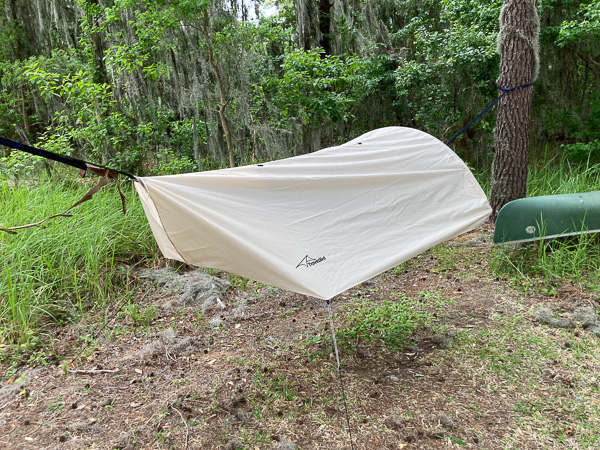
Here’s a closeup of the spreader in action. You can also see the standard carabiner suspension and entry zipper. Note that these are not the supplied straps, which are two feet shorter and could not span the distance between my “hammock testing” trees.
Hammock Spreader
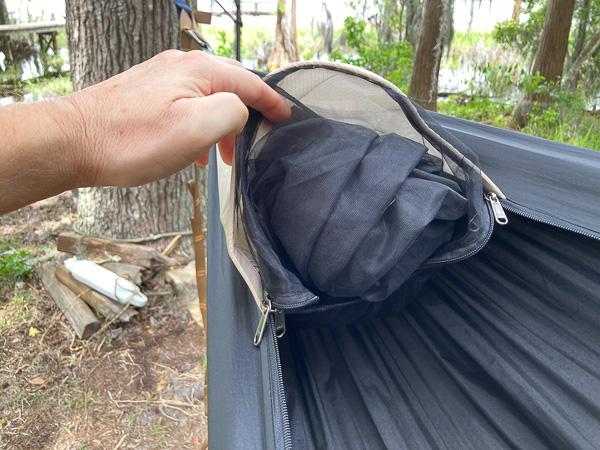
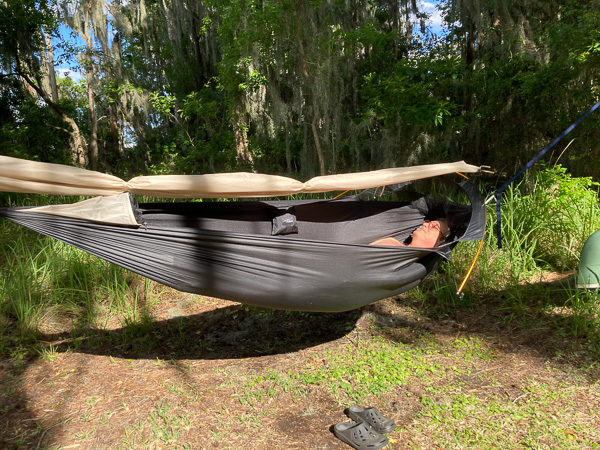
Note that you can enter from either side, and the netting folds away
into a pocket at the foot when you don’t want it. (Nice!)
The dark netting is also better for stargazing at night.
Hammock Netting Folded
When you lay down in the hammock the spreader bends and keeps quite a bit of tension under your shoulders. I’m still experimenting with proper pitch for the most comfortable effect. My only major complaint–at only 100 inches it’s too short. It should be 104-106 inches IMO. I’m 6 foot 2, so if it works for me it will probably work well for anyone who is shorter.
Inside Hammock Pano
Rainfly
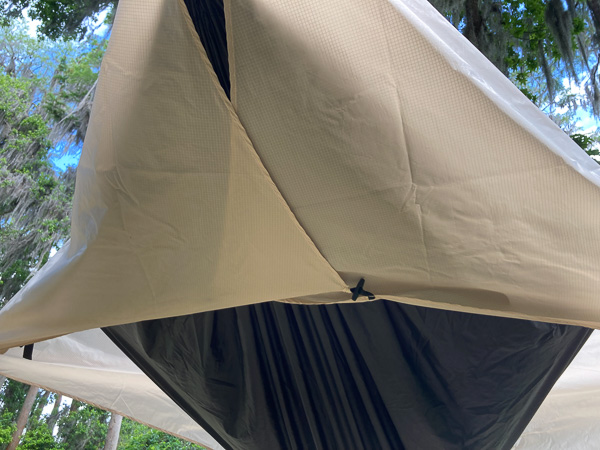
The rainfly is a custom shape and the spreader supports it just like a modern tent.
The problem is the inadequate ridge-line tension using the weak elastic tabs on the ends.
I re-engineered this with some shock-cords that tighten the fly and allow it to
rise above the netting for better airflow.
Weak Fly Attachment
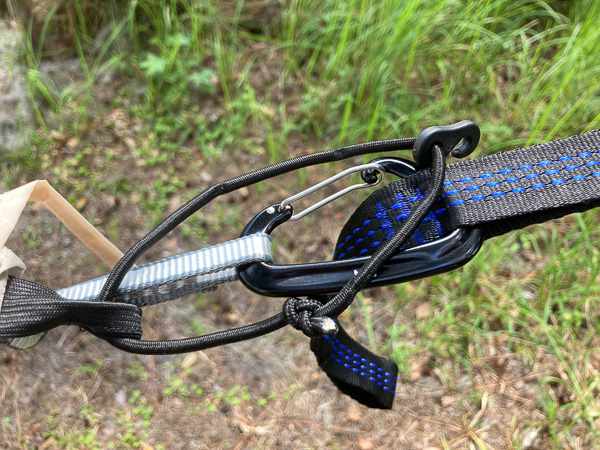
I added a six inch shock-cord loop and hook.
Better Fly Attachment
As you can see there is more tension on the fly.
And when the hammock is loaded the fly can better maintain both height and tension.
Fly Under Tension
The fly can be tucked on both ends to keep out blowing rain. This works very well!
Fly Tucked Under
I’ve found that in many situations the foot can be left lightly tied or loose.
The side pull-out tabs can be tied to each other as shown below (black tabs near the ground).
Loose Footed Fly
If more wind is anticipated you can stake out the fly as shown below.
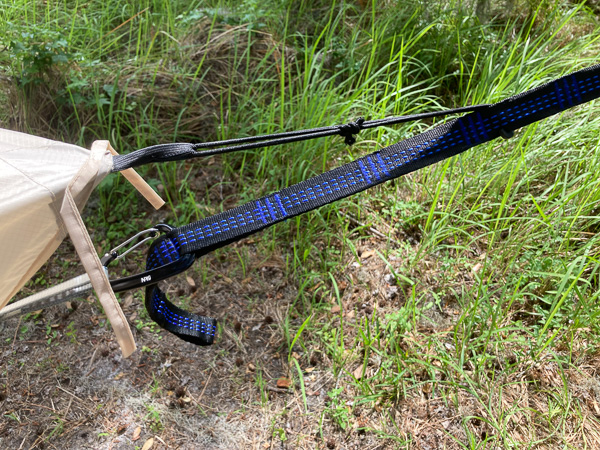
The hammock came with thin elastic cords that I replaced with heavier shock-cords and lightweight rope.
(The knots are an adjustable Taut-Line Hitch and a Zeppelin Bend to connect cord to rope.)
Hammock Knots
The final result meets the four point rule outlined above, and keeps the head and sides clear of ropes!
Staked Out Fly
If you want to hedge your bet you can reef the fly along the ridge-line. This also makes it easy to pack up when you’re breaking camp. Note that one of the reef points was not sealed properly and caused a minor leak. I will be adding some seam sealer to address this.
Fly Reefed at Ridge-Line
Note that this is the first hammock I’ve seen where you can
access and deploy part of the rain-fly from the inside!
Fly Access from within the Hammock
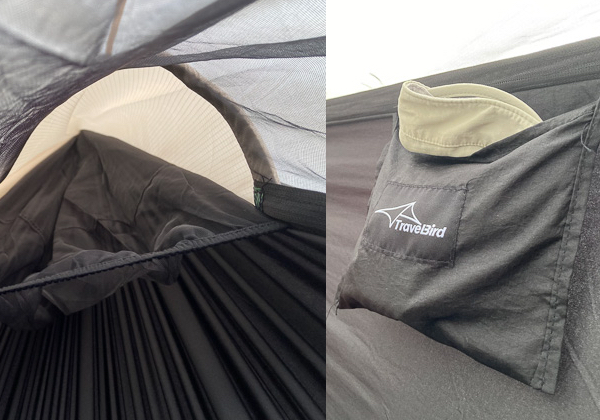
There are two pockets, one at the foot and one along the right side.
As always, I wish there were more pockets and larger.
A “loft” near the head would also be helpful.
Hammock Pockets
Recommendations
PROS
a good hammock overall, at a great price (~$69)
single external pole design, fewer ropes!
enter from either side
netting folds out of the way
dark netting is good for stargazing
CONS
too short (needs 4-6 inches more IMO)
rainfly needs better suspension (easy to fix)
included hanging straps are adequate, but short
no ridge-line, so harder to hang (minor)
side-zipper bag included, a stuff sack would be better