I recently acquired a kayak and have been experimenting with ways to carry it on the roof of my Prius. I’ve had lots of experience with canoes, which you can flip over on your shoulders (portage position) and place them on top of the car from that stance. With a sit-on-top kayak there’s no place for your head to go. I was stuck looking for a way to get the kayak on top of the care by myself. Then I hit on the idea outlined below.
A Note of Caution! Carrying a large object on top of a car is potentially dangerous. These instructions are intended as a guide only. It is up to you to ensure that your specific application is safe! If in doubt get someone with more experience to help you.
Mounting/Dismounting
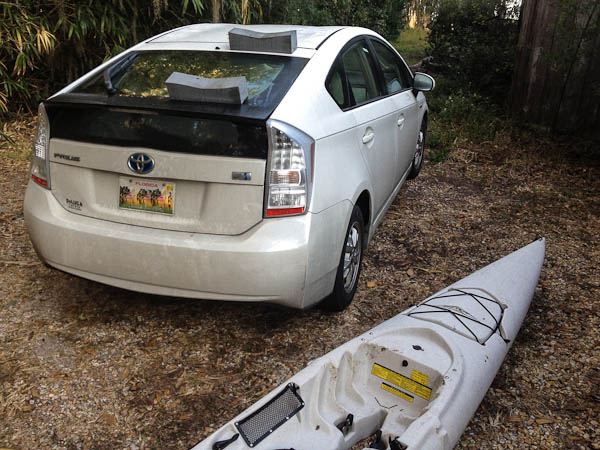
You will need a standard set of kayak pads, 14-16 inches wide as shown below. I bought mine online for less than $15. Make sure the pads are clean and free from small grains of sand. You may also wish to temporarily place a rag or other barrier to protect your car’s finish. Success depends on the kayak hull sliding over these pads. A little dish soap might help if there is too much friction.
Step 1
If you haven’t already, remove everything you can from the boat. You want it to be as light as possible and avoid items that will blow in the wind.
Place the pads and kayak as shown here. Notice I started on the side of the roof, not the center. You could start in the center if your arms are long enough and you avoid the rear wiper and antenna mount. The side seemed easier to me.
Step 2
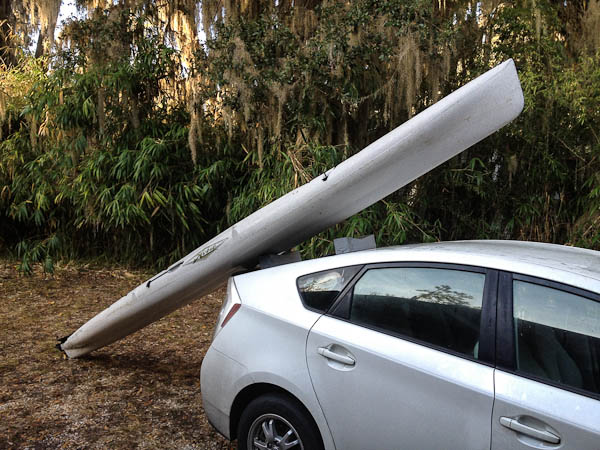
Lift the end of the kayak onto the rear pad. With a Prius, the hull may rest partially on the spoiler. This is okay as long as you tilt the boat completely onto the pad before you do any sliding.
Step 3
Lift the back end of the kayak and slide the boat forward on the rear pad. Then lift higher and slide it forward on the forward pad until it balances easily on the roof as show here.
Step 4
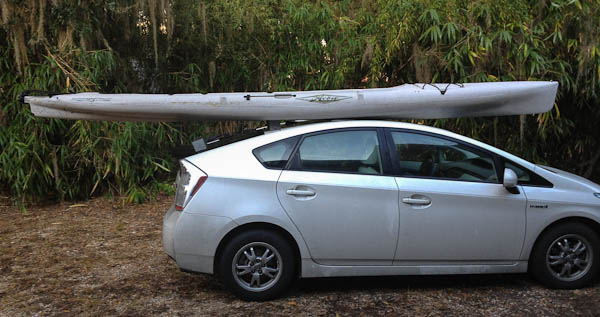
Move the rear pad up to the front and continue to slide the boat forward to the final position. You can then “walk” the ends toward the middle, fine tune the pad placement and tie it down. The hull should be nearly horizontal when you are finished. Be sure there is at least an inch of clearance between the hull and the roof.
Simply reverse these steps to get the boat down when you arrive at your destination.
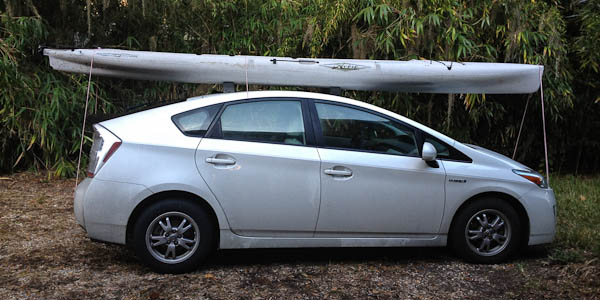
The Classic Four Point Tie down
This the standard technique using rope to tie down any sort canoe or kayak on the roof of a car. If you have straps, the details will be different but you must ensure that the boat is secure at all four points (forward, aft, left and right)!
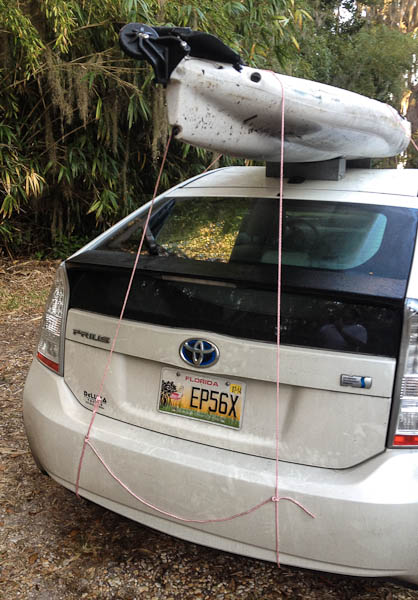
Larger cars often have metal eyes underneath that were used to secure the car during shipping. These are excellent tie down points when they are available. Larger cars have four. Some have two in the front and only one in the back. The Prius for some reason has only one left rear tie down eye. Most of the undercarriage is covered by plastic panels to minimize drag. Whatever the configuration you must find four secure (metal!) tie down points before proceeding.
With the Prius it is necessary to use metal “S” hooks for three of the four tie down points. There is no easy way for me to photograph these points, and they probably vary somewhat from one model year to another. You will need to get down on the ground and inspect the underside of your car for attachment points. Do not attach to anything plastic!
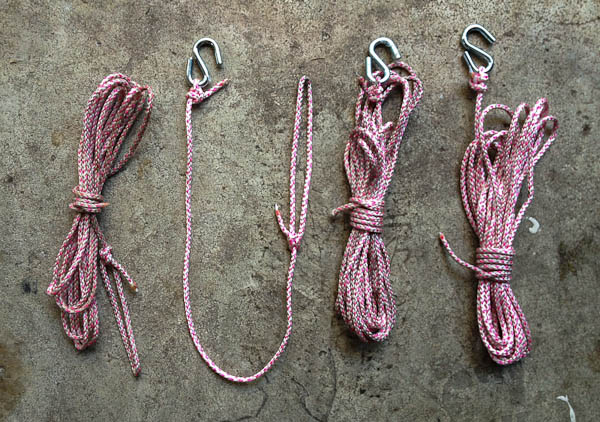
Here are the lines I use (from left to right): side line (through the rear doors), front cheater hook, front line with hook, rear line with hook…
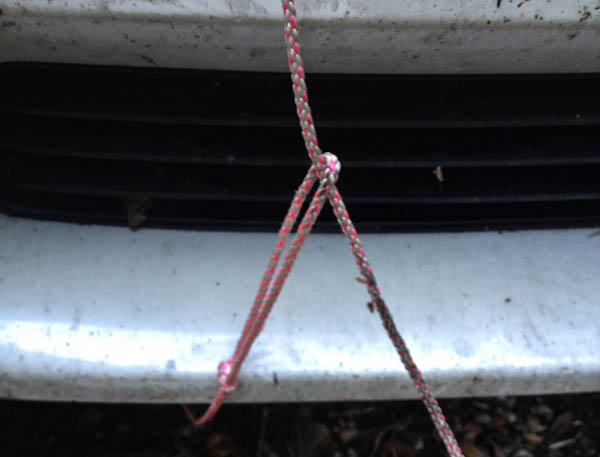
Start by attaching the three hooks to their respective tie down points. The cheater line acts as a pulley for the longer line as show here.
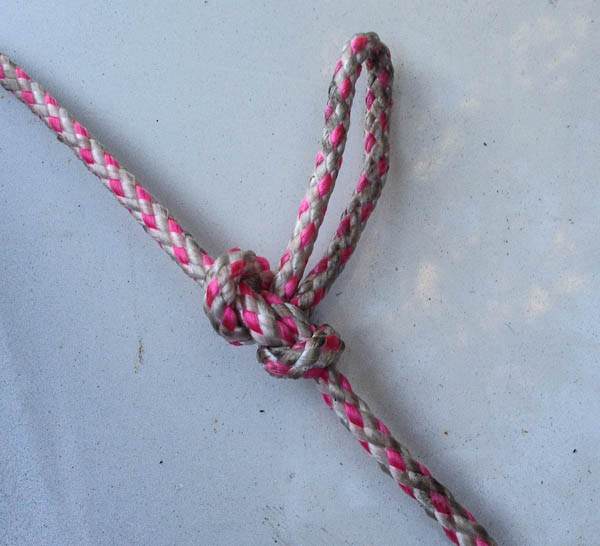
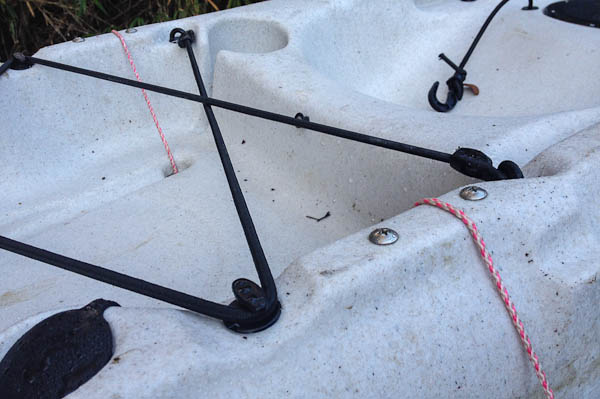
You must be comfortable tying a few basic knots such as the Bowline and Taut-Line Hitch. I use the Butterfly Loop (below) for mid-rope attachments. There are several alternatives for all of these, so use the knots you know well and trust!
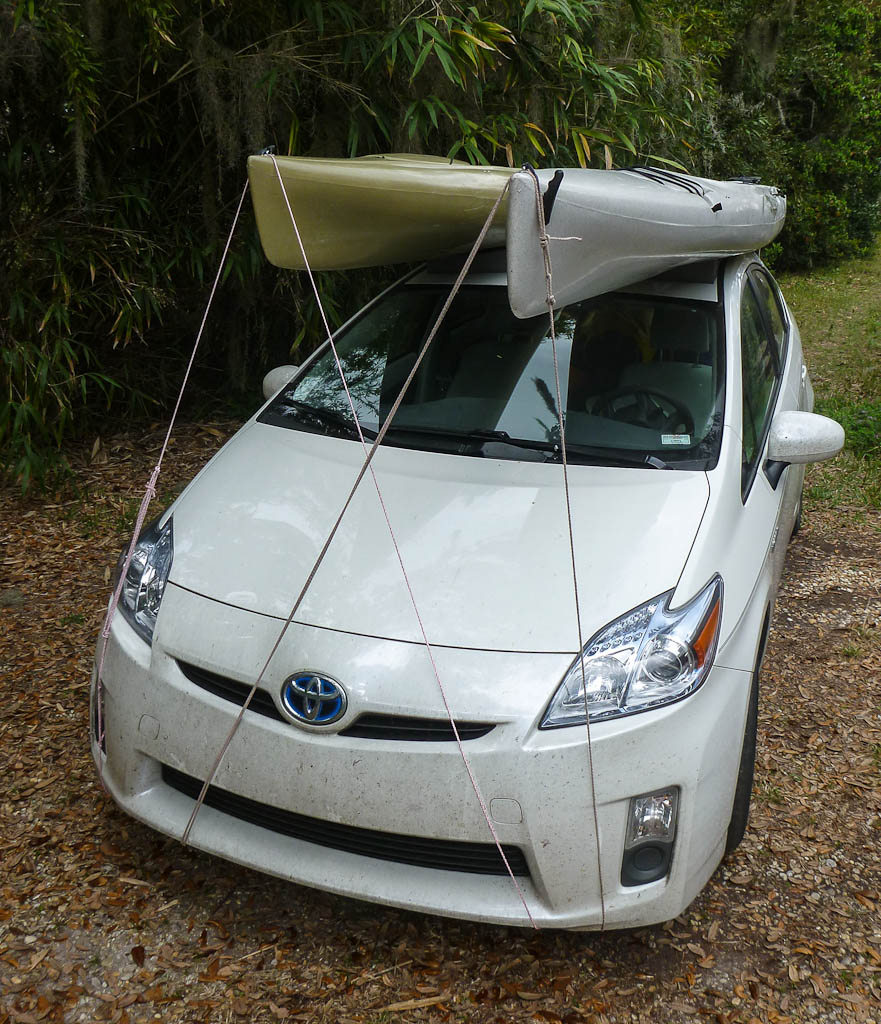
The front and back should have an inverted “V” configuration. Note that the rope in this example is coming up from the hook on the right, through a steel eyelet on the bow, down to the cheater loop, back through the eyelet, and is tied with tensioning knots near the top right.
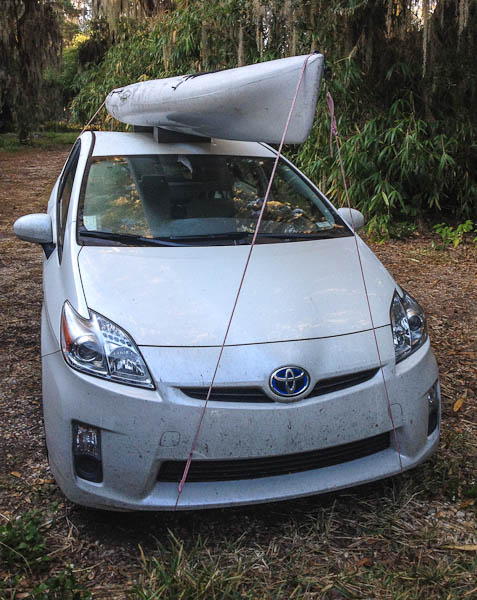
The rear may have less of a “V” depending on the specifics of your situation. Again, the rope is passed through a steel eyelet, which is out of view in this photo.
I like to use a mid-rope loop knot to create a mechanical advantage for tightening up the rig. Shown here the rope doubles back through a Butterfly Loop to a Taut-Line Hitch above. You can adjust the Taut-Line as needed to keep the lines tight. Gather up any loose ends that may flap in the breeze as you’re driving.

Finally you should add the side rope(s), which on a small car will be a single line passing through the rear doors. With a canoe this should be attached to the thwart (or other robust fitting). With my particular kayak it made sense to thread the rope through the scuppers. Tighten all the lines one last time and you’re done!
I have taken this rig on the road twice and it seems very stable. You should plan on stopping at least once along the way to check the lines and add tension if needed. Enjoy your trip!
January 2013 Update
If one is good, why not try two! This rig worked remarkably well for my recent trip to the Everglades. Note that the boats are not tied together, they are independently tied as outlined above. I think this adds strength and stability. And yes, I got them both up and down by myself!