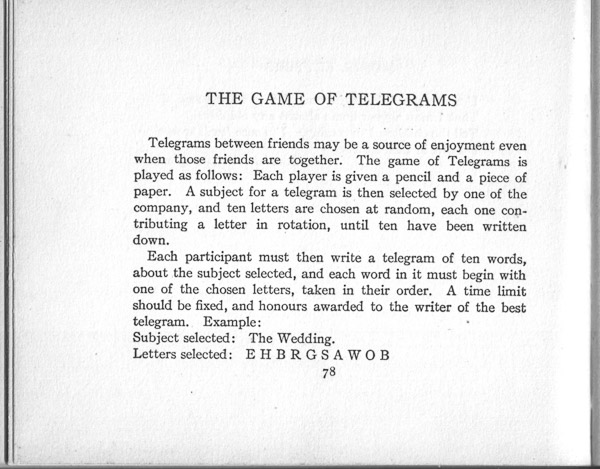
I left the Birdsite about six months ago when the new owner started mucking about.

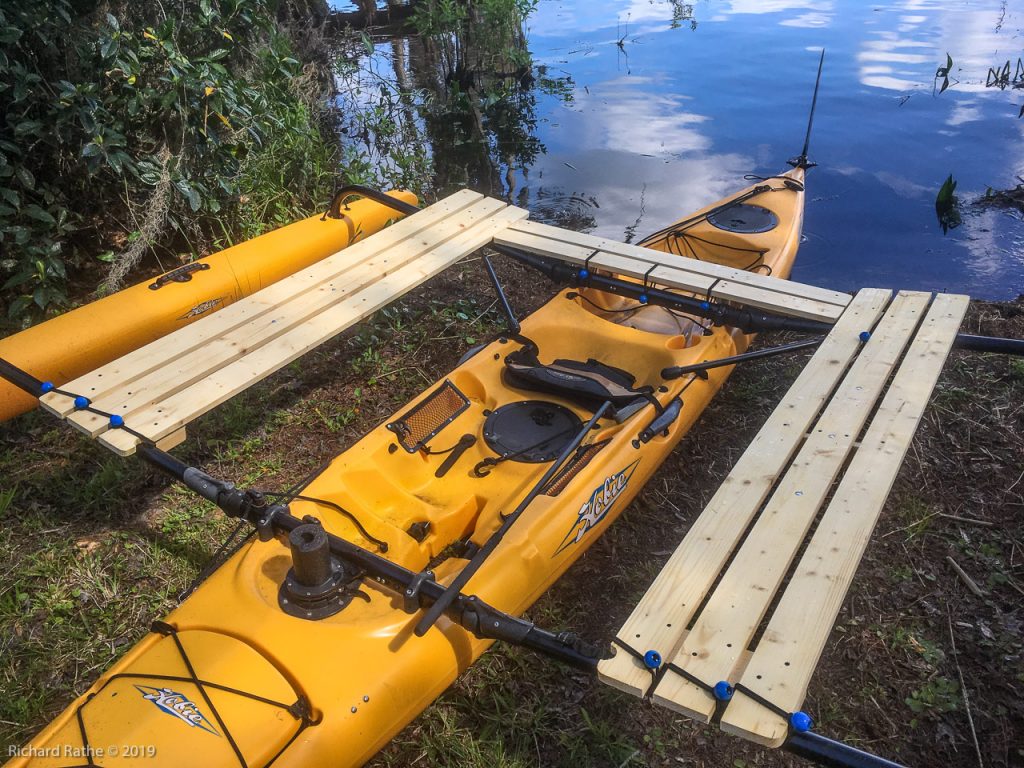
No regrets! Mastodon has been so much better! I decided to try my hand at creating an automated “robot” to post quotations alongside some of my photographs.
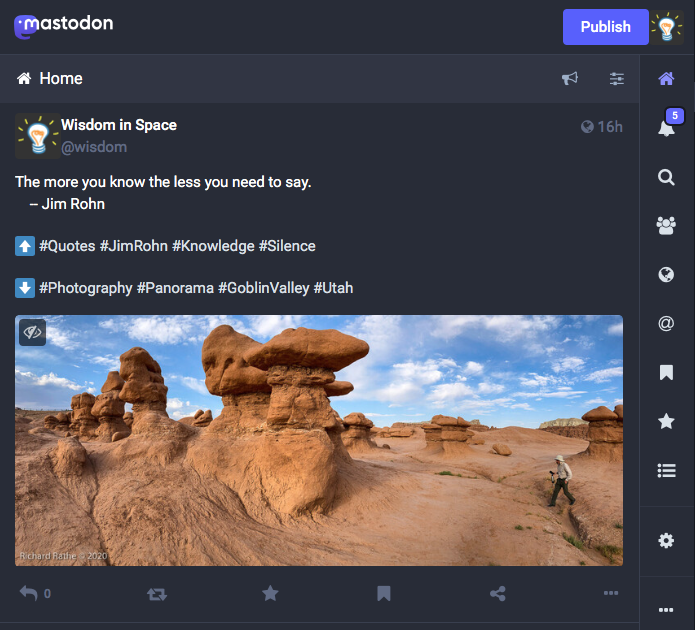
Mastodon is much more civilized and well organized—including best practices for social media bots. There is even a server dedicated to bots called “botsin.space”–so I called my new bot “Wisdom in Space“.
There are many helpful websites to get started. Most use the mastodon interface package for Python. This is the first time I’ve written code in the python language, but fortunately the learning curve isn’t very steep. The biggest conceptual hurdle for me was understanding and using virtual environments on the shared server. Once I got those pesky details worked out I set up a cron job to post every four hours. The quotes are in a tab-delimited text file and the images are in a nearby directory. Note the development code below works locally on my laptop. The directory paths and other details are different on the server. I hope someone finds this useful!
#
#	wisdombot 0.2
#	quote of the day service for mastodon
#	copyright richard rathe 2023
#	(cc) attrib-noncomm-share-alike
#

import re

import glob

import random

from mastodon import Mastodon

quote_list = []

with open('wisdom.dat') as file:

	for line in file:

		line = line[:-1]  # remove newline

		quote_list.append(line)


qmax = str(len(quote_list))

image_list = glob.glob('images/*.jpg')

imax = str(len(image_list))

qrand = random.randrange(int(qmax))

line = quote_list[qrand]

line = line.replace('—'  , '--')	# fix entities
line = line.replace('"'   , '\"')
line = line.replace('é' , 'e')
line = line.replace('ø' , 'o')
line = line.replace('ö'   , 'o')
line = line.replace('&'    , '&')

data_list = line.split('\t\t')		# double tab delimited

irand = random.randrange(int(imax))	# pick image at random

img = image_list[irand]

match = re.search(r'^images/([a-z0-9-]+)', img, re.I)

if match:
	stem = match.group(1)
else:
	stem = ''

ikeyw = ''

for i in stem.split('-'):
	i = i[0].upper() + i[1:]	# capitalize
	ikeyw += " #" + i

ikeyw = ikeyw[1:]	# nuke leading space

keyw = ''

for i in data_list[2].split('/'):	# keywords are '/' delimited
	i = i.replace(' ', '')
	i = i.replace('-', '')
	keyw += " #" + i

keyw = keyw[1:]		# nuke leading space

quote = data_list[3]

name = data_list[0]				# author name

ntag = re.sub('[^0-9a-zA-Z]+', '', name)	# author hashtag
ntag = '#' + ntag

other = data_list[1]				# source info (if available)

if other == 'None':
	other = '';
else:
	other = ' (' + other + ')'

out = quote + '\n    -- ' + name + other + '\n\n'

out += '⬆ #Quotes ' + ntag + ' ' + keyw + '\n\n⬇ #Photography ' + ikeyw

if len(out) < 500:		# limited to 500 chars

	print('\n' + out + '\n')

	mastodon = Mastodon(
		access_token = 'token.secret',
		api_base_url = 'https://botsin.space/'
	)

	media = mastodon.media_post(img, description="photo by richard rathe")
 	mastodon.status_post(out, media_ids=[media])